
You wake up with itchy red welts on your arms, pull back the bedsheet, and spot tiny rust-colored stains. That sinking feeling hits fast, you’ve got bed bugs. If you’re searching for how to get rid of bed bugs in the bed, you’re not alone. Bed bug complaints across Bangalore have risen steadily over the past few years, and these pests don’t discriminate between a studio apartment and a sprawling villa.
The good news is that early-stage infestations can often be managed with the right combination of cleaning, heat treatment, and targeted products you can apply yourself. The bad news? Bed bugs are stubborn. They hide in mattress seams, behind headboards, inside electrical outlets, anywhere they can stay close to a blood meal. Skipping a single step usually means they bounce right back within weeks.
In this guide, we’ll walk you through a clear, practical process to eliminate bed bugs from your home, from identifying the infestation and prepping your space to treatment methods that actually work and prevention steps that keep them gone. Every recommendation here comes from what we’ve learned across 32+ years of hands-on pest control work at Bed Bugs Professionals. We’ll also be upfront about when a DIY approach is enough and when it’s time to call in a professional team for a thorough, lasting solution.
Before you start: confirm bed bugs in the bed and plan
Rushing into treatment for bed bugs in the bed without confirming the pest is one of the most common mistakes homeowners make. Misidentifying a spider bite or flea rash as bed bugs leads to wasted time, unnecessary chemicals, and the actual infestation growing unchecked. Before you learn how to get rid of bed bugs at home, you need to know exactly what you’re dealing with and where the problem is concentrated.
Spot the signs of bed bugs in the bed
Bed bugs leave behind specific, identifiable evidence that separates them from other pests. Check your mattress seams, bed frame joints, headboard cracks, and nearby furniture. Look for these signs:
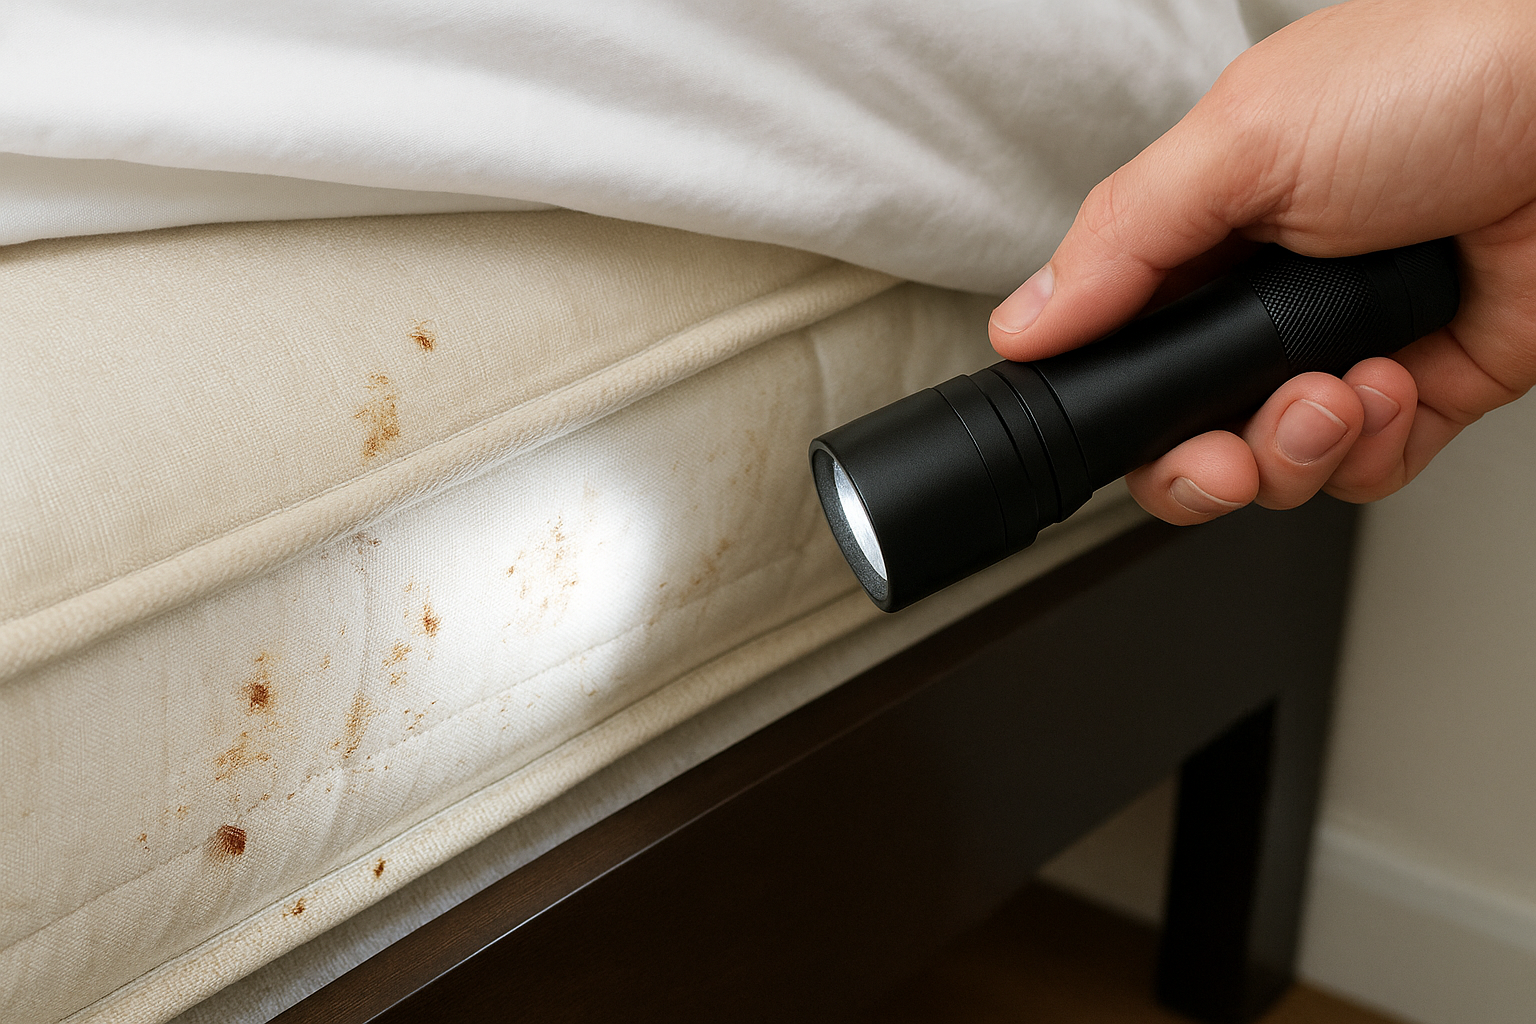
- Rust-colored or dark brown stains on mattress fabric or bedding (digested blood from their droppings)
- Tiny white eggs or shed skins in mattress seams or along baseboards
- Live bugs (apple-seed sized, flat, reddish-brown) in seams, corners, or behind wall outlets
- Clusters of itchy, red welts on your skin that appear overnight, often in a line or zigzag pattern
Finding even one live bug or a cluster of stains confirms an active infestation and means you need to act right away, not next weekend.
Build your inspection map before you treat bed bugs in the bed
Once you confirm bed bugs in the bed, map every area where you’ve found evidence before you touch anything. Use a flashlight and a stiff card to probe seams and corners. Check the following locations systematically:
| Location | What to look for |
|---|---|
| Mattress seams and tags | Stains, shed skins, live bugs |
| Box spring and bed frame | Eggs, dark spots |
| Headboard and wall joints | Clusters of bugs or eggs |
| Nightstands and dressers | Droppings in drawer corners |
| Baseboards and electrical outlets | Eggs or live bugs hiding flat |
Recording where you find evidence helps you prioritize treatment zones and track whether your efforts are actually working over the following weeks.
Common mistakes that stall bed bug treatment
Most failed DIY attempts don’t fail because the methods don’t work, they fail because a small mistake undoes an otherwise solid process. Knowing these traps in advance saves you weeks of repeat effort.
Watch out for these common errors:
- Treating only the bed and skipping the surrounding room. Bed bugs travel along baseboards, behind picture frames, and into nightstands within days of a partial treatment, so a bed-only approach almost always leads to a second wave within a month.
- Using foggers or bug bombs as a first response. Foggers scatter bed bugs deeper into wall voids and furniture instead of killing them, making the infestation harder to track and treat afterward.
- Moving untreated items between rooms. A single lamp, phone charger, or stack of books carried out of an infested room before bagging can reseed a bug-free space.
- Stopping treatment as soon as bites stop. Bites can stop for a week or two even while a small surviving population regroups; interceptor traps, not your skin, are the reliable signal that the infestation is actually gone.
- Washing without a chemical follow-up. Water alone does not reliably kill bed bug eggs; an odorless chemical treatment applied to the clean, dry fabric is the step that actually finishes the job.
- Ignoring nearby rooms and shared walls in apartments. In multi-unit buildings, bed bugs move through wall voids and shared plumbing chases, so a neighboring unit’s untreated infestation can undo your own treatment within weeks.
Avoiding these mistakes matters more than any single product you buy, since consistency and thoroughness are what actually separate a lasting fix from a temporary lull.
Step 1. Contain bed bugs in the bed and declutter
Containment is the first critical action you take before treating bed bugs in the bed with any cleaning or treatment method. Bed bugs spread by hitchhiking on clothes, bags, and furniture, so moving infested items carelessly through your home turns a single-room problem into a whole-house problem fast.
Stop the spread before you do anything else
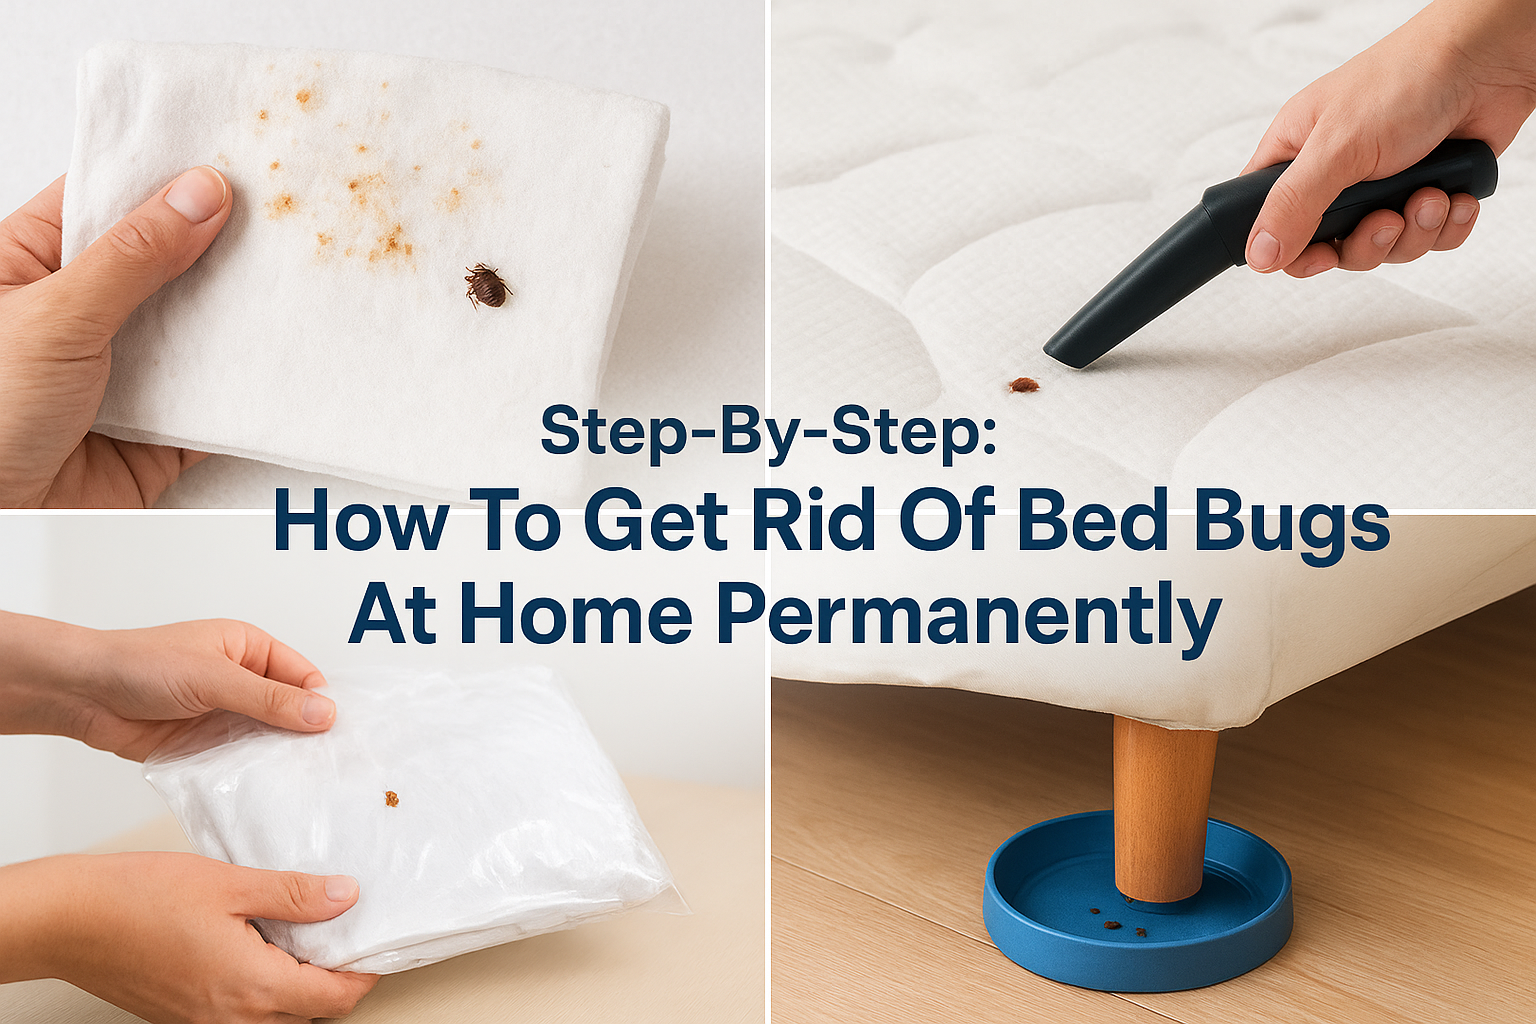
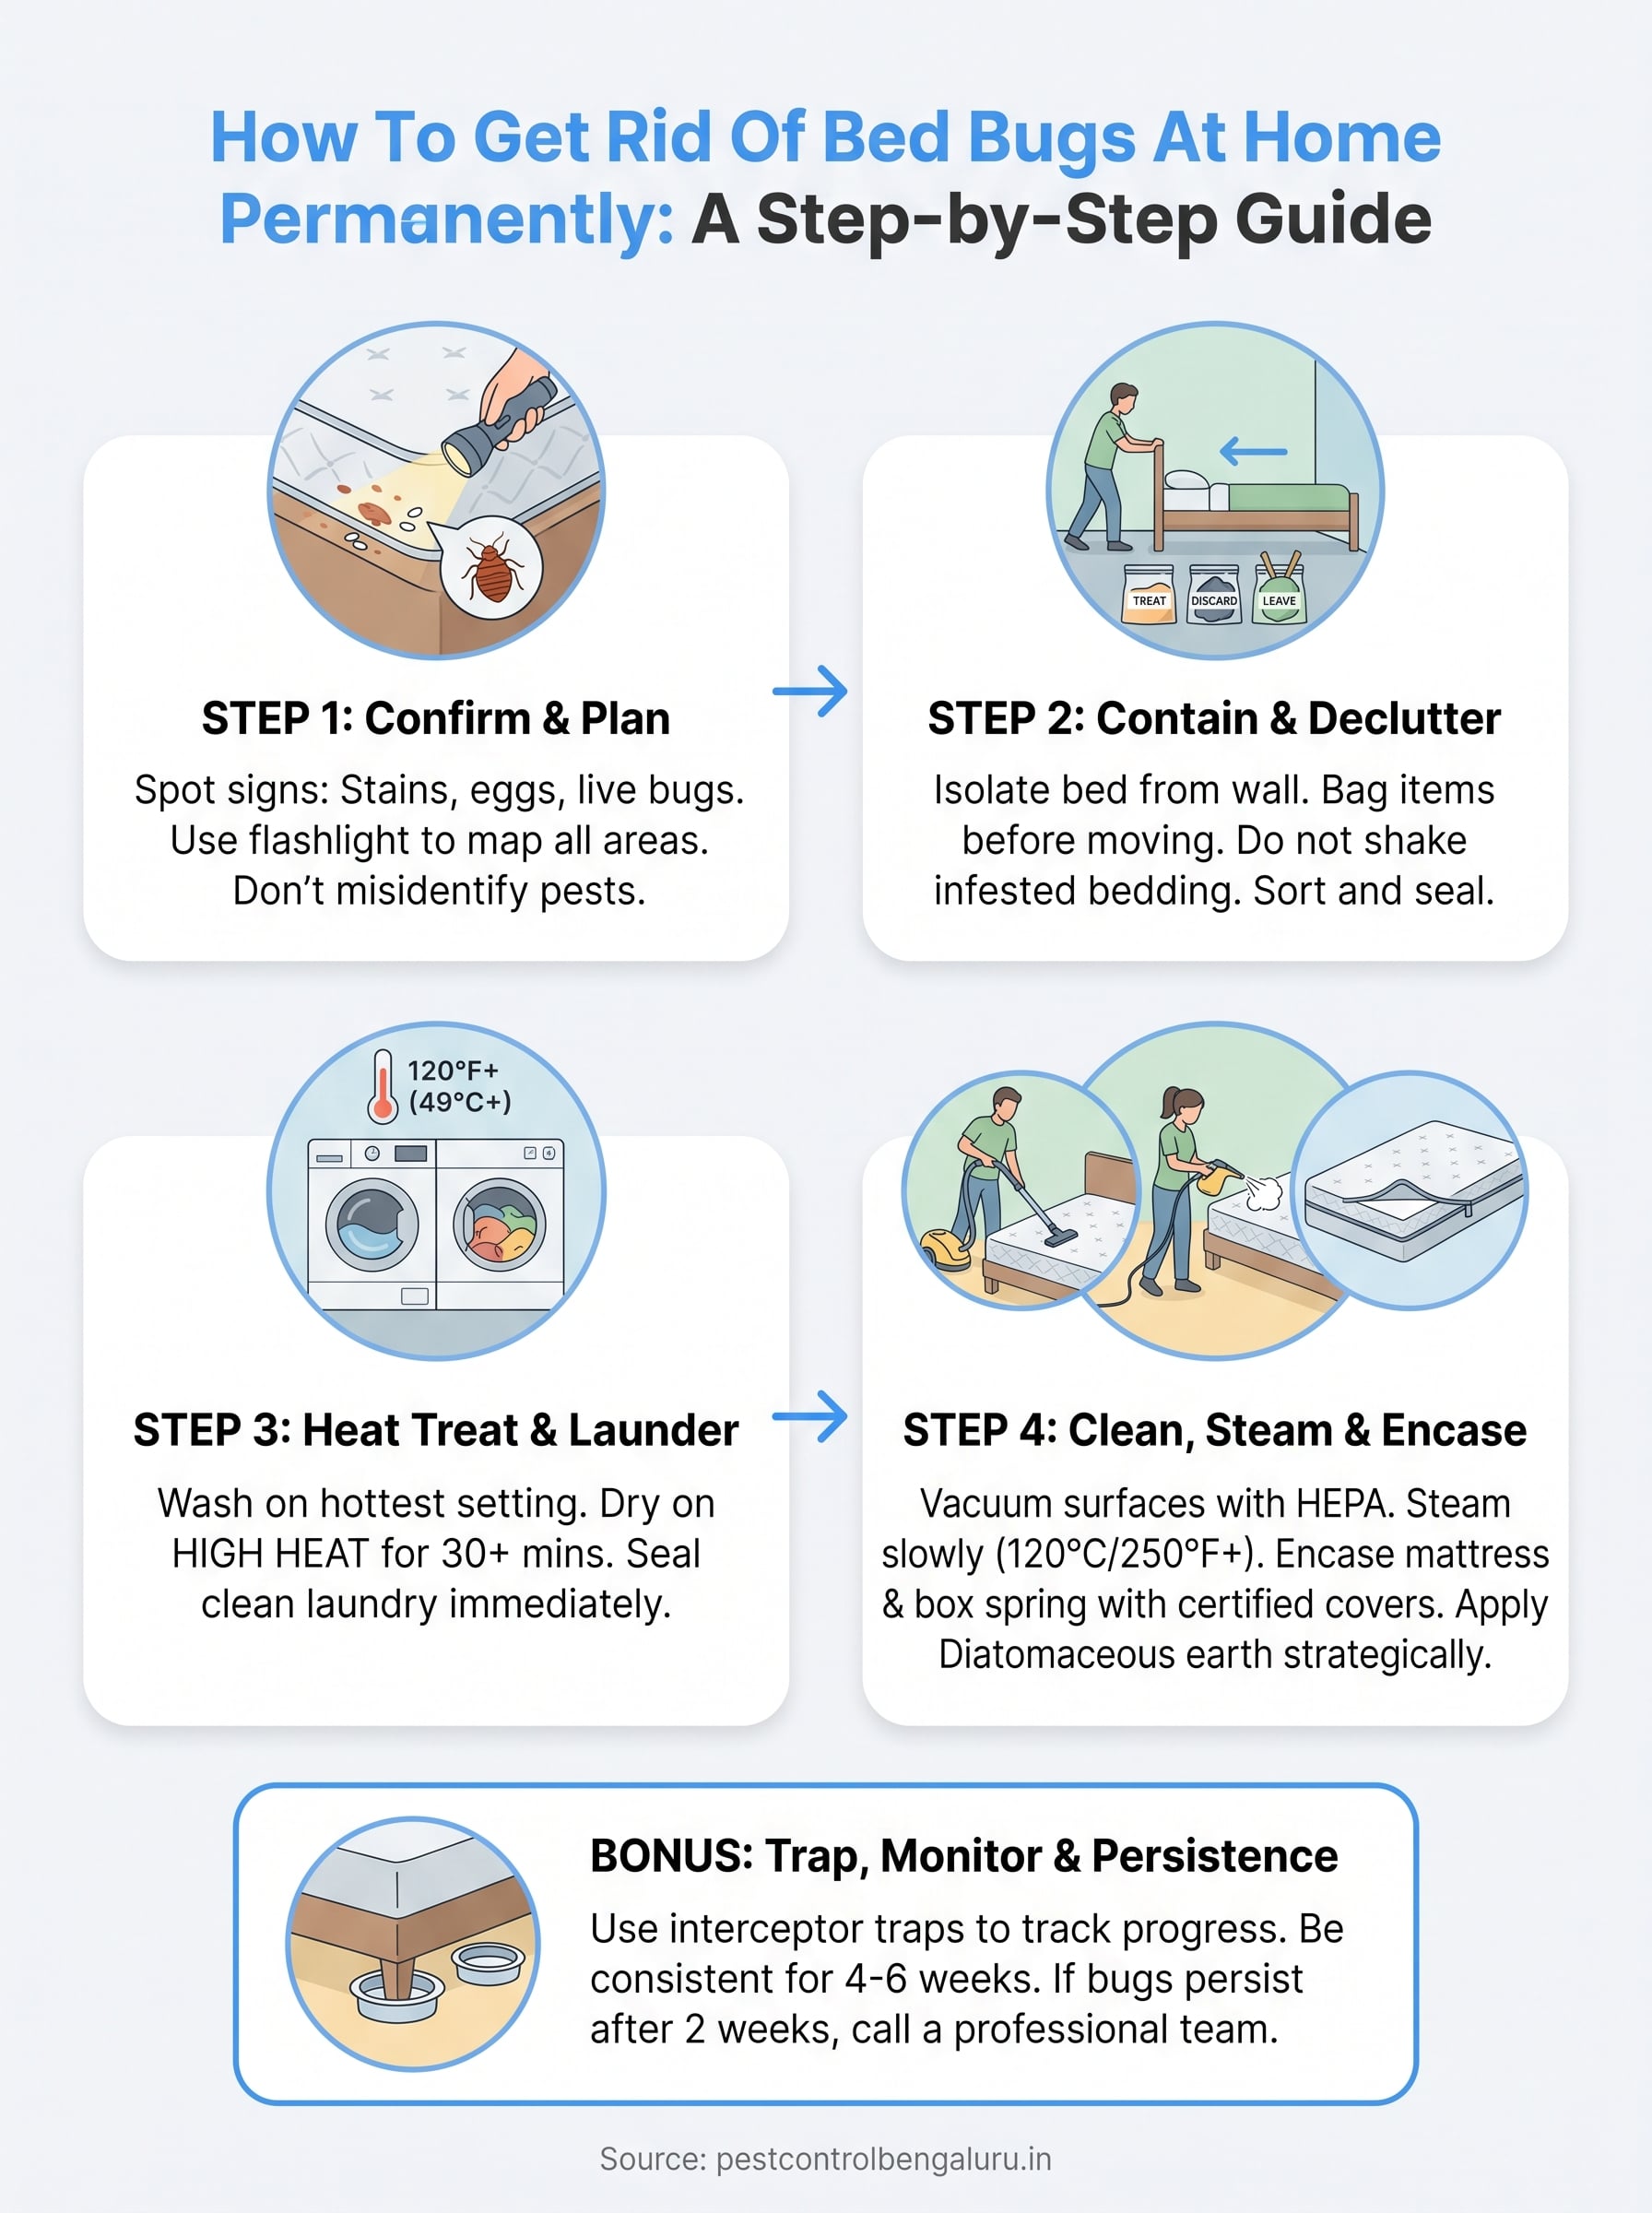
To start containing bed bugs in the bed, pull your bed frame away from the wall so it stands isolated in the center of the room. Remove any storage items under the bed and bag them immediately in sealed plastic bags. Do not carry these bags through other rooms without sealing them shut first. This single step limits how far the bugs can travel while you work through the rest of the process on how to get rid of bed bugs at home.
Never shake out infested bedding in another room or hallway. Bag everything where it sits.
Declutter without spreading bugs
A cluttered room gives bed bugs dozens of extra hiding spots that treatments simply cannot reach. Work through the room and sort items into three groups: bag and seal items you will treat, bag and seal items you will discard, and items you can safely leave in place. Label every sealed bag clearly so you know what has been treated and what has not before anything re-enters your bedroom.
Step 2. Get rid of bed bugs in the bed with odorless chemical treatment and laundering
Odorless chemical treatment is one of the most reliable tools you have when figuring out how to get rid of bed bugs at home. A pyrethrin-based, odorless spray labeled specifically for bed bugs knocks down live bugs fast and, applied thoroughly along seams and joints, reaches the hiding spots a surface wipe-down misses. Pairing it with a normal wash of your bedding is a non-negotiable part of the process.
Launder and treat everything you can
Strip all bedding, pillowcases, curtains, and any fabric near the infested area and bag them before moving them out of the room. Wash everything as you normally would, then, once dry, mist a light, odorless bed bug spray along seams and folded edges before storing the laundry back in a sealed bag. Treating the fabric after washing is what actually clears bugs and eggs the wash cycle alone can miss.
Seal clean laundry in fresh plastic bags the moment it comes out of the dryer, and do not return anything to the bedroom until your full treatment is done.
Items that can’t go in the washer
Stuffed toys, shoes, and small fabric items can be treated directly with a light, odorless bed bug spray and left sealed in a plastic bag for a few hours before use. For larger soft items like backpacks or throw pillows, apply the same spray along seams and zippers, then seal them in a bag for the same waiting period.
Additional chemical options to reinforce treatment
A few supporting products work alongside your main odorless spray without adding extra steps to your routine. None of these replace the core process, but they add useful pressure on survivors.
Options worth adding to your routine:
- Food-grade diatomaceous earth dusted along baseboards and drawer gaps damages the bug’s outer shell and kills them over several days.
- Residual odorless sprays labeled for bed bugs, reapplied along baseboards every one to two weeks, keep knocking back bugs that resettle in a freshly treated area.
- Silica gel packets placed inside drawers and along baseboard gaps draw moisture away from hiding spots and slowly dehydrate bugs over time.
- Sealing cracks and gaps in baseboards, skirting boards, and around pipe entries with caulk removes hiding spots permanently, which chemical treatments alone never address.
These steps work best as reinforcement around the chemical and vacuum process, not as a substitute for it. Relying on light add-ons alone, without the core chemical and vacuum steps, is the most common reason a lighter-touch approach fails to fully clear an infestation.
Step 3. Vacuum and treat bed bugs in the bed and room
After treating your fabrics, you need to physically remove bed bugs and their eggs from surfaces that cannot be laundered. Vacuuming and chemical spraying work together as a two-pass system: vacuuming pulls out live bugs and loose debris, while an odorless chemical spray reaches into seams and tight crevices to kill anything the vacuum missed. Skipping either pass leaves gaps in your treatment that bed bugs will quickly exploit.
Vacuum every surface methodically
Use a vacuum with a HEPA filter and work slowly across the entire mattress surface, paying close attention to seams, tufts, and tags. Run the nozzle deliberately along every crack in the bed frame, headboard, and baseboards. After you finish vacuuming, seal the vacuum bag or empty the canister directly into a sealed plastic bag and take it outside immediately. Leaving it inside risks releasing captured bugs right back into the room.
Follow with an odorless chemical spray
A pyrethrin-based, odorless spray labeled specifically for bed bugs is one of the most effective tools for how to get rid of bed bugs at home. Apply it slowly and thoroughly over mattress seams, box spring edges, and all along the baseboards, giving it time to reach into every crevice.
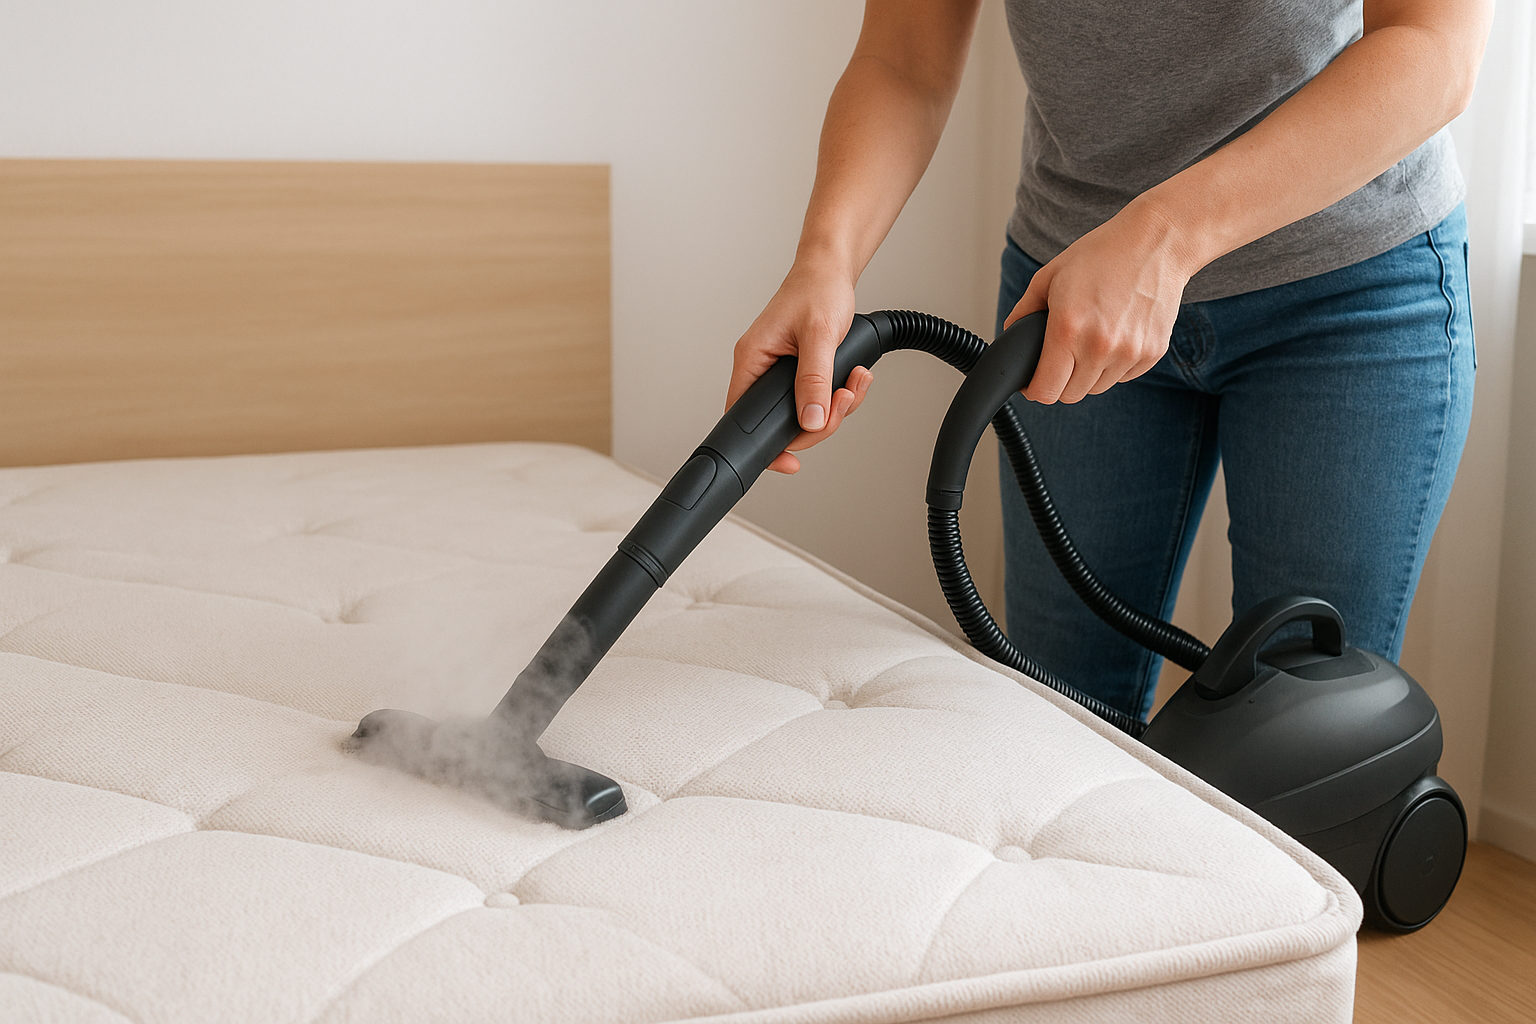
Do not rush the spray application; moving too quickly means some seams and crevices never get proper coverage to kill eggs.
Room-by-room prevention after treatment
Once the bedroom is under control, extend a lighter version of the same vigilance to nearby rooms, since bed bugs that were only partially exposed to treatment sometimes relocate rather than die outright.
A short prevention pass through the rest of the home:
- Living room: Vacuum sofa seams and cushions, and avoid bringing secondhand upholstered furniture inside without inspecting it first.
- Guest rooms: Wash bedding on high heat after any guest stay, especially after travel, since bed bugs frequently hitchhike in luggage.
- Closets and storage: Keep clothes and linens in sealed bins rather than open shelving while your bedroom treatment is ongoing.
- Entryways: Inspect secondhand furniture, mattresses, or rugs brought in from outside before they reach any bedroom.
A short walk-through of these areas once a week during your four-to-six-week monitoring window catches early signs before they become a second full infestation.
Step 4. Encase and trap bed bugs in the bed, then monitor and treat safely
After steaming, you lock in remaining bugs and track survivors through encasements, interceptor traps, and targeted chemical treatments. This is the layer that turns short-term cleaning into a lasting result when working out how to get rid of bed bugs at home, so don’t skip it.
Encase your mattress and box spring
To finish clearing bed bugs in the bed, buy zippered bed bug-proof encasements for both your mattress and box spring. These seal surviving bugs inside and cut off their access to food until they die. Choose encasements labeled "bed bug certified" with a reinforced, bite-proof zipper. Leave them on for at least 12 months, since bed bugs can survive extended periods without a blood meal.
Place interceptor cups under each bed leg right after encasing; these catch bugs climbing up or down and give you a clear read on whether the infestation is actually clearing week by week.
Apply chemicals safely and strategically
Diatomaceous earth (food-grade) applied along baseboards, behind electrical outlets, and inside bed frame joints damages the bug’s outer shell and kills them over several days without harsh fumes. For faster knockdown, use pyrethrin-based sprays labeled specifically for bed bugs along baseboards and frame joints. Follow these safety precautions every time you apply any chemical treatment in the room:
- Keep children and pets out during application
- Allow all treated surfaces to dry fully before re-entering
- Never spray directly onto mattress fabric
Treating bed bugs in the bed itself
Since most infestations start and concentrate in the mattress and frame, treating bed bugs in the bed deserves extra attention on top of the whole-room process above. When you’re focused specifically on how to get rid of bed bugs in the bed, the mattress, box spring, and frame joints are where the highest concentration of bugs and eggs typically lives, and where repeat treatment passes pay off the most.
Focus areas inside the bed structure:
- Every seam and piped edge of the mattress, checked twice with a flashlight
- The underside of the box spring, including staples and corner blocks
- Bed frame joints, screw holes, and any hollow metal or wood tubing
- The headboard’s mounting brackets and the wall space directly behind it
Run the chemical spray and vacuuming passes described in Step 3 specifically over these zones a second time, even after you’ve treated the rest of the room. Bed bugs sheltering in the bed itself are the ones most likely to survive a single pass, since seams and joints are easy to under-treat compared with open fabric.
Once the mattress and frame are treated, install the encasement and interceptor traps from Step 4 right away. This closes off the bed as a hiding place while you keep watching the rest of the room, and it’s often the single change that finally stops bugs in the bed from reappearing after a few weeks of otherwise-effective treatment.
Getting rid of bed bugs in the bed for good
If your infestation is concentrated entirely in the mattress and frame, knowing how to get rid of bed bugs in the bed matters more than treating the rest of the room. Most people searching for how to get rid of bed bugs in the bed are dealing with an early-stage problem where the bugs haven’t yet spread past the sleeping area, which is actually the easiest scenario to fully resolve.
The fastest path to get rid of bed bugs in the bed combines three things at once: the odorless chemical treatment and laundering from Step 2, the vacuum-and-spray pass from Step 3 repeated specifically along mattress seams and frame joints, and the encasement plus interceptor traps from Step 4. Skipping any one of these three usually means bugs resurface in the bed within a few weeks, even if the rest of the room looks clear.
How long does it take to get rid of bed bugs in the bed?
Most light-to-moderate infestations clear within four to six weeks when you follow every step consistently and keep checking interceptor traps. Severe infestations can take longer and often need professional treatment alongside your own efforts.
Can I get rid of bed bugs in the bed without throwing out the mattress?
Yes, in most cases. Heat treatment, steaming, vacuuming, and a certified encasement let you keep your mattress. Replacement is usually only necessary when the mattress is torn or heavily infested beyond what encasement can contain.
Do bed bugs ever fully leave a treated bed?
They can, but only if you stay consistent. A single missed pass or an untreated crack nearby lets survivors move back in, which is why interceptor traps matter as much as the initial treatment.
What’s the single most important step to get rid of bed bugs in the bed?
If you can only prioritize one step, make it the encasement plus interceptor traps from Step 4. The odorless chemical spray kills what it reaches, but the encasement is what stops any survivor from feeding again, and the traps are how you confirm bed bugs in the bed are actually gone rather than just hiding for a week.
Is odorless chemical treatment safe around children and pets?
Most odorless, pyrethrin-based sprays labeled for bed bugs are safe once fully dry, but you should still keep children and pets out of the room during application and allow treated surfaces to air out fully before anyone re-enters. Never spray directly onto mattress fabric where someone will sleep that night, and check the product label for its specific re-entry time.
How soon can I sleep in the bed after treatment?
Once the spray has dried completely and the room has aired out, usually a few hours, it’s safe to remake the bed and sleep in it again. Keep the encasement and interceptor traps in place from that point on so you can track whether any bugs are still active.
Will odorless chemical treatment leave a residue or smell?
A properly labeled odorless spray dries clear and without a noticeable scent once it has fully set. If you do notice an odor after drying, air out the room for a few extra hours before use rather than adding more product.
Do I need to repeat the chemical treatment more than once?
Yes, in most cases. A single application knocks down live bugs but rarely reaches every egg, so plan on a second application seven to ten days later to catch anything that has since hatched, and keep monitoring interceptor traps in between.
Supplies checklist for treating bed bugs in the bed
Before you start the process of how to get rid of bed bugs in the bed, gather everything up front so you are not pausing mid-treatment to order a missing item while bugs keep spreading. Having every tool on hand also keeps you from cutting corners on any single step, which is usually where a DIY effort falls short.
What to have ready before you begin:
- A steam cleaner rated to at least 120°C (250°F) at the nozzle, with a narrow attachment for seams and joints
- A vacuum with a HEPA filter and a crevice attachment for mattress tufts and baseboards
- Bed bug-certified, zippered encasements sized for your mattress and box spring
- Interceptor traps for every bed leg
- Food-grade diatomaceous earth and a duster applicator for baseboards and frame joints
- A pyrethrin-based spray labeled specifically for bed bugs
- Heavy-duty sealable plastic bags in several sizes, for laundry, discarded items, and vacuum debris
- A bright flashlight and a stiff card or old gift card for probing seams
Working through this list before Step 1 means every later step in this guide on how to get rid of bed bugs in the bed moves faster, since you will not be interrupting a heat cycle or steam pass to run to the store.
Your next move
You now have a complete process for how to get rid of bed bugs at home, from confirming the infestation and containing it, through odorless chemical treatment and vacuuming, and finally locking in your results with encasements and targeted chemical applications. Follow every step in order and track your interceptor traps weekly to measure real progress rather than guessing.
Most light-to-moderate infestations respond well to this approach if you stay consistent over four to six weeks. Severe infestations, recurring problems, or bugs spreading across multiple rooms are a different situation, and DIY methods rarely achieve full elimination once the infestation reaches that scale.
If you have completed the full process and bugs are still showing up in your interceptors after two weeks, that is your signal to bring in professional help.
What professional treatment typically adds beyond DIY: licensed technicians use professional-strength, odorless residual insecticides that are not sold for consumer use, applied deep into wall voids and furniture your spray bottle can’t fully reach. Most professional programs include a follow-up visit two to three weeks after the first treatment to confirm the infestation has fully cleared, which is difficult to replicate with DIY tools alone.
Severe or recurring infestations, bugs spreading to multiple rooms, or a rental property with shared walls are all situations where professional treatment resolves the problem faster and more reliably than continuing to repeat the DIY cycle. Contact the team at Bed Bugs Professionals for a thorough inspection and a treatment plan built around your specific situation.