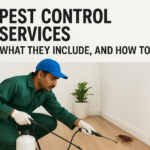


A single cockroach spotted by a customer can undo years of reputation-building overnight. For restaurant owners and managers in Bangalore, pest control for restaurants isn’t just a maintenance task, it’s a direct line to your business survival. Health inspectors, online reviewers, and FSSAI compliance requirements all demand that your kitchen and dining areas stay pest-free, every single day.
The challenge? Restaurants are magnets for pests. Warmth, moisture, constant food supply, and heavy foot traffic create the perfect conditions for cockroaches, rodents, flies, and stored-product insects to thrive. Reactive treatments, spraying only after you spot a problem, won’t cut it in a food service environment. You need a structured, ongoing system that prevents infestations before they start and addresses them fast when they do. That system is called Integrated Pest Management (IPM).
This guide walks you through every step of building and maintaining a practical IPM program for your restaurant. From sanitation protocols and facility maintenance to choosing the right treatment methods and keeping proper documentation, you’ll get a clear, actionable framework you can implement right away. At A to Z Pest Solutions, we’ve worked with restaurants, hotels, and food businesses across Bangalore since 1993, and the principles in this guide reflect over three decades of hands-on commercial pest management experience. Whether you’re running a fine-dining establishment or a quick-service outlet, this is the playbook that keeps pests out and customers coming back.
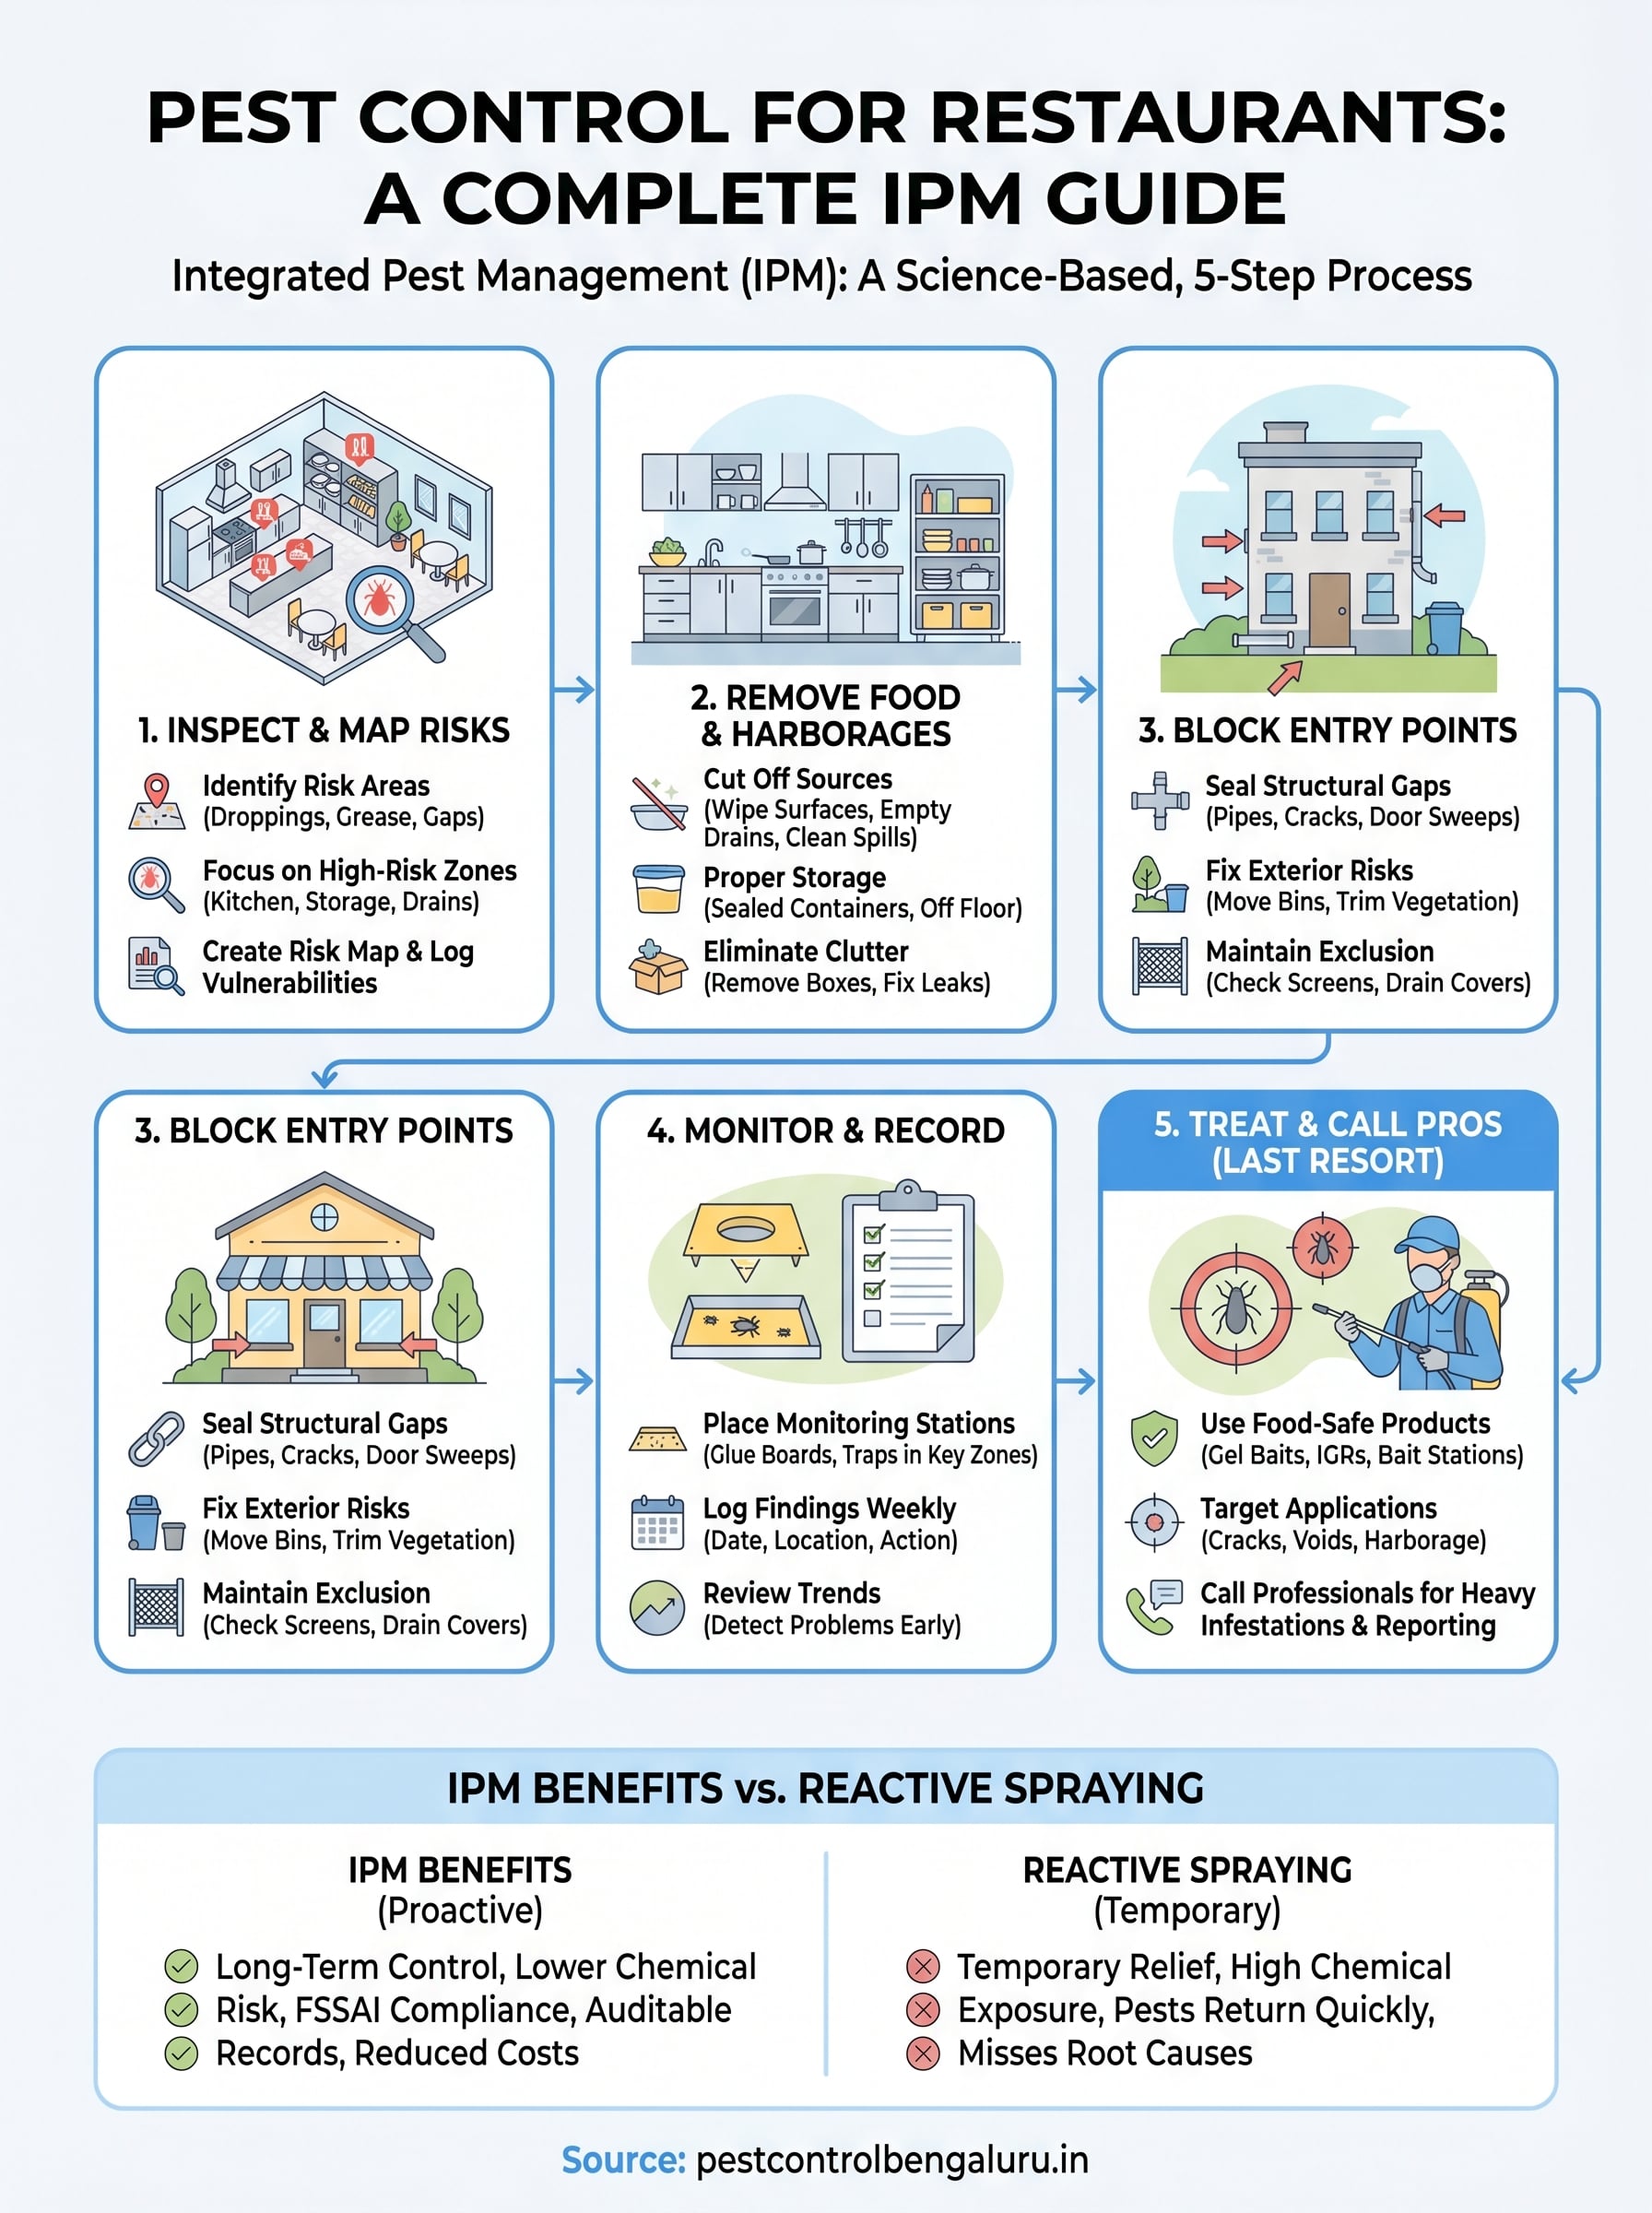
What IPM means for restaurant pest control
Integrated Pest Management (IPM) is a science-based approach that combines prevention, monitoring, and targeted treatment to control pests with the least possible risk to people, food, and the environment. Unlike conventional pest control for restaurants, which often means spraying chemicals on a fixed schedule regardless of whether pests are present, IPM treats pest management as a continuous process, not a one-time fix. You assess the conditions that allow pests to thrive, eliminate those conditions first, and only escalate to chemical treatment when other methods fall short.
IPM prioritizes removing the root causes of infestations, not just the visible symptoms.
The core idea is that pests don’t appear out of nowhere. They enter your restaurant because they find food, water, shelter, or an easy access point. Every IPM decision you make ties back to denying pests one or more of these four things. When you seal a gap around a pipe, store dry goods in airtight containers, or fix a leaking drain, you’re actively practicing IPM. Chemical intervention becomes a last resort rather than the first response.
The four pillars of IPM
Understanding the four pillars helps you see how each step in this guide connects to a larger system. These pillars don’t work in isolation. Each one reinforces the others, and skipping any single pillar weakens the whole program.
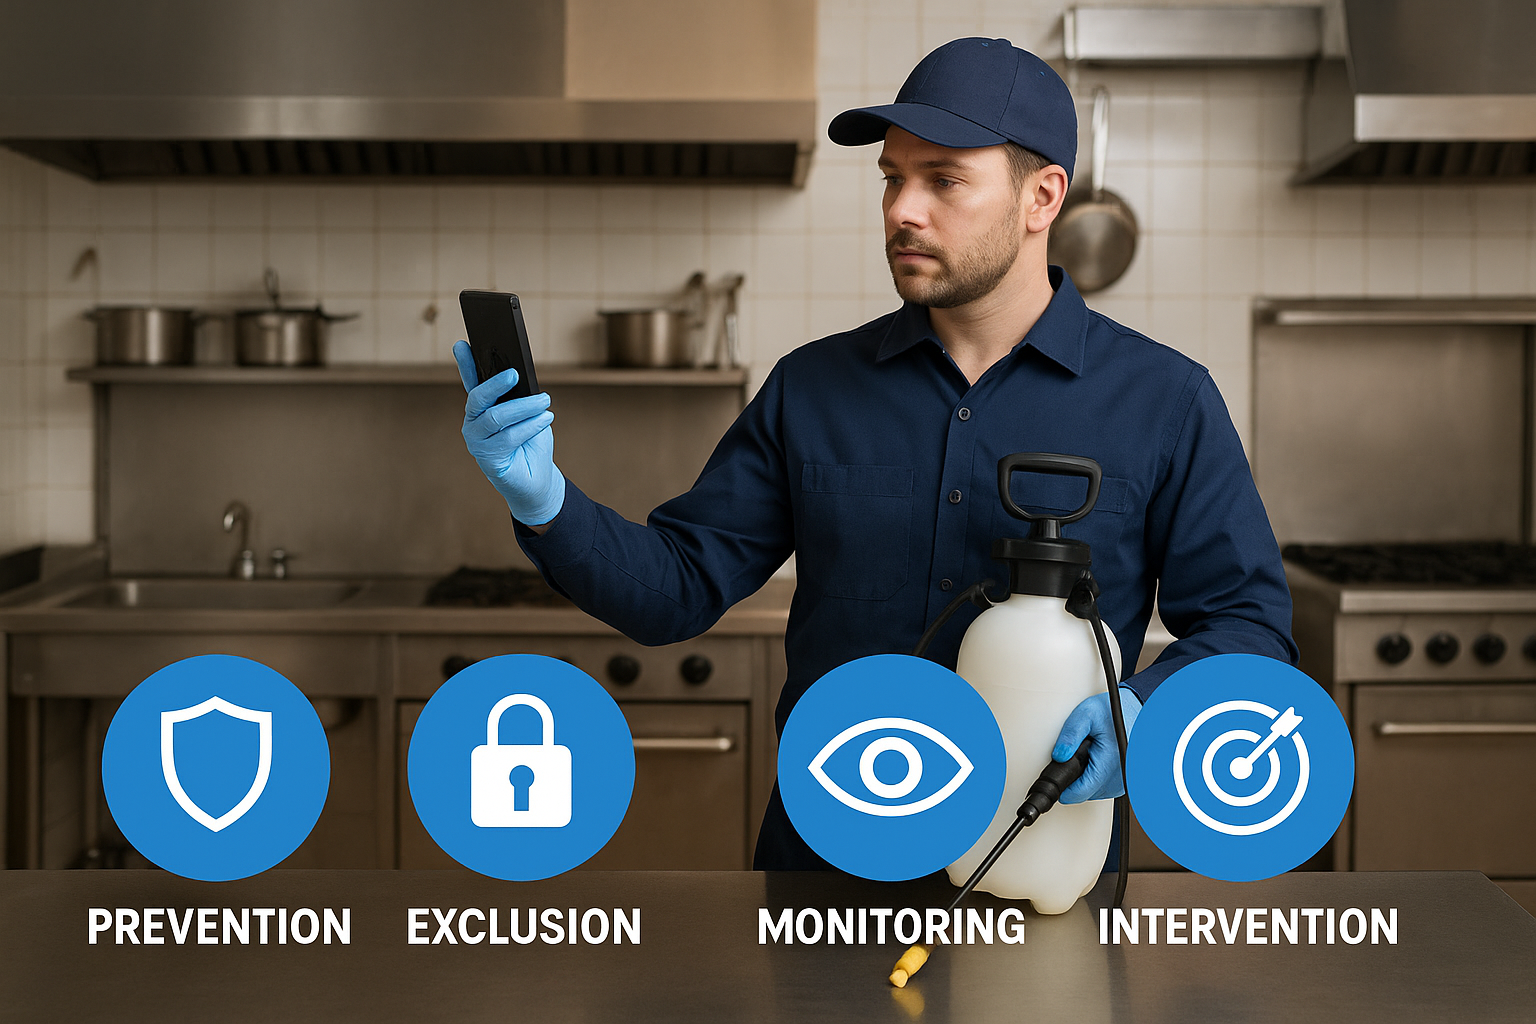
- Prevention: Eliminate conditions that attract or support pests. This covers sanitation practices, proper food storage, waste management, and staff training.
- Exclusion: Physically block pests from entering your facility. Seal cracks, install door sweeps, repair damaged window screens, and eliminate harborage sites.
- Monitoring: Use traps, visual inspections, and staff reports to detect pest activity early. Catching a problem at three cockroaches is far easier than managing three hundred.
- Intervention: When prevention and exclusion fall short, apply targeted treatments. In a food service setting, this means choosing food-safe products, applying them precisely, and documenting every application.
Why IPM outperforms reactive spraying
Many restaurant operators still rely on a monthly spray visit and little else. That approach fails for two reasons. First, broad-spectrum pesticide applications don’t address the underlying conditions that caused the infestation, so pests return within weeks. Second, routine spraying in a kitchen environment creates unnecessary chemical exposure risk for your staff and customers.
IPM flips this model entirely. You invest more effort in prevention upfront, which means fewer treatment interventions over time and measurably lower long-term costs. A restaurant running a tight IPM program typically needs professional chemical treatment less often than one relying on reactive spraying, because the conditions that sustain pest populations are continuously being addressed rather than temporarily suppressed.
How IPM connects to FSSAI compliance
The Food Safety and Standards Authority of India (FSSAI) requires food businesses to maintain pest-free premises as part of their hygiene and sanitation obligations. An IPM-based program gives you something reactive spraying alone cannot: documented, auditable evidence that you’re actively managing pest risks. Inspectors want to see records, and a well-run IPM program generates them naturally through monitoring logs, treatment reports, and corrective action notes.
Running a documented IPM program also protects your business if a customer complaint or license inspection ever puts your operation under scrutiny. Your records become your defense, showing exactly what steps you took, when you took them, and what results followed. That paper trail carries real weight with food safety authorities, and building it costs you nothing beyond a bit of consistent record-keeping.
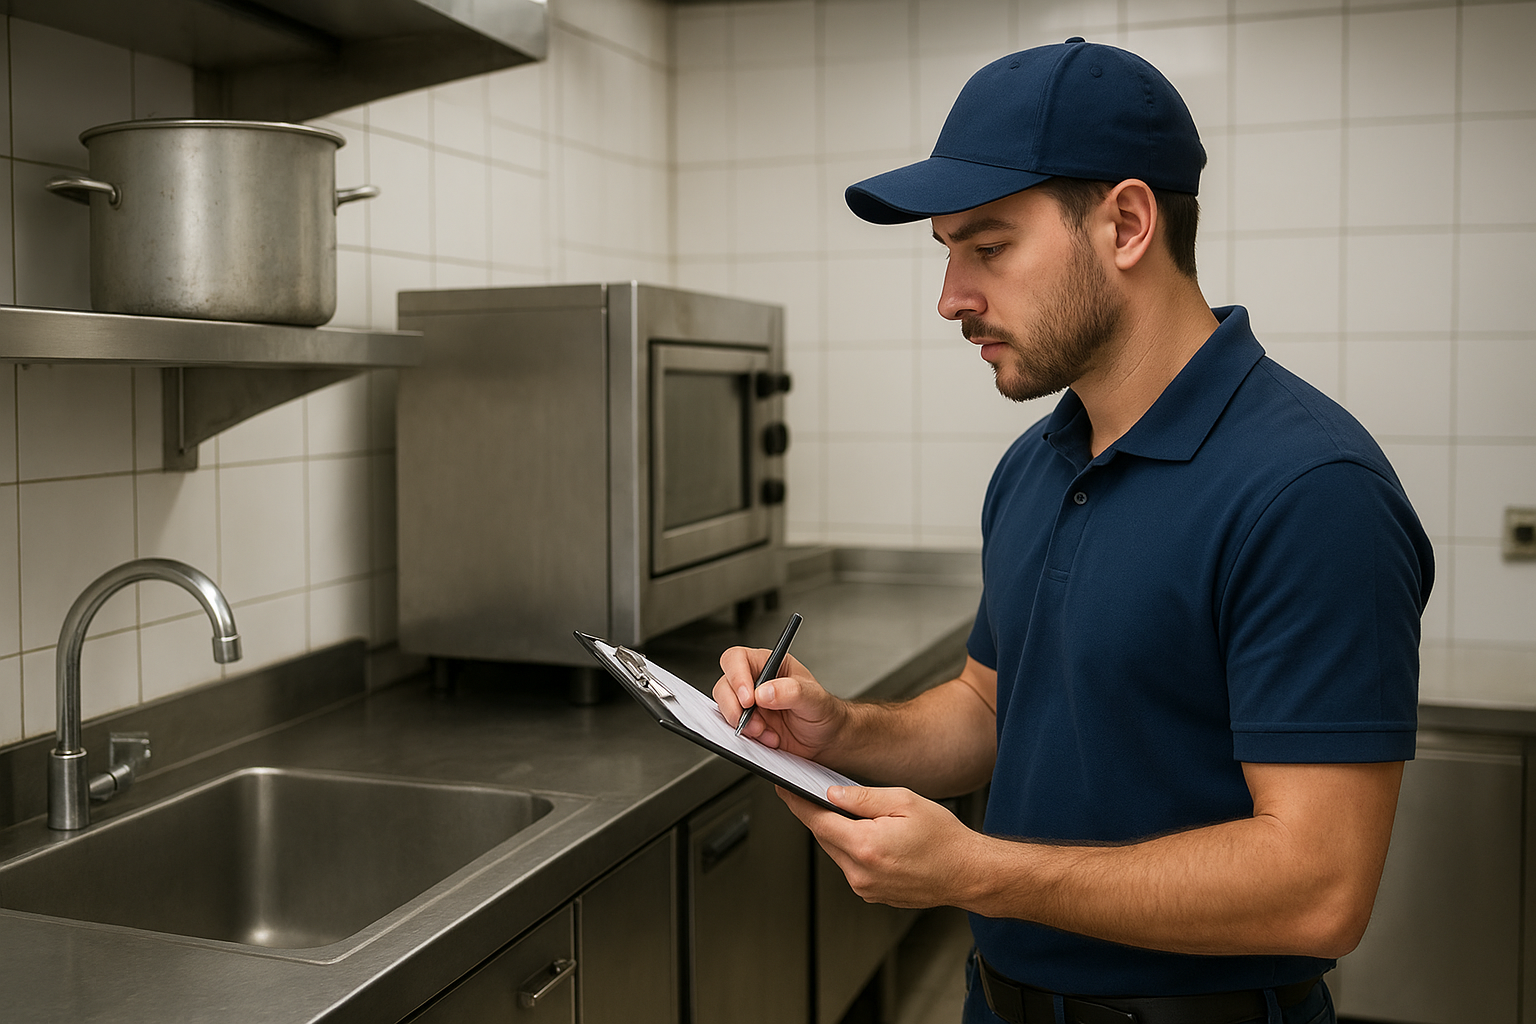
Step 1. Inspect your restaurant and map risk areas
A thorough inspection is the foundation of any effective pest control for restaurants program. Before you can fix a problem, you need to know exactly where pests are entering, hiding, and feeding inside your facility. Walk through every area of your restaurant with fresh eyes, as if you’ve never seen the space before. Look for evidence of activity, not just live pests. Droppings, grease trails, gnaw marks, and shed skins all tell you what’s been living in your restaurant long before you spotted a single insect or rodent.
Where to look during your inspection
Most restaurant operators check the obvious spots and miss the ones that matter most. High-risk zones include areas where food waste accumulates, moisture collects, or structural gaps allow entry. Focus your inspection on these specific locations:
- Kitchen: Under and behind appliances (ovens, fryers, refrigerators), inside floor drains, around pipe penetrations, inside wall voids near heat sources
- Storage areas: Along the base of shelving units, inside cardboard boxes, behind bulk dry goods, floor corners
- Receiving dock: Around door frames, floor gaps, exterior wall joints, drain covers
- Bar and service areas: Behind ice machines, under bar counters, inside bottle storage
- Dining room: Upholstered booth seams, under fixed furniture, near HVAC vents
The areas you clean least often are almost always the areas pests use most.
How to create a risk map
Once you’ve completed your walkthrough, document what you found on a simple floor plan of your restaurant. You don’t need specialized software. A hand-drawn sketch or a printed layout works fine. Mark each location where you spotted pest activity evidence, structural vulnerabilities like cracks or gaps, and areas with standing moisture or poor sanitation. Assign each marked area a risk level: high (active signs of pests), medium (conditions that attract pests but no current evidence), or low (minor vulnerabilities).
Use this template to log each risk area you identify:
| Location | Pest Evidence Found | Risk Level | Action Needed |
|---|---|---|---|
| Behind reach-in fridge | Cockroach droppings | High | Treatment + seal gap |
| Dry storage corner | Moisture staining | Medium | Fix drainage, monitor |
| Receiving dock door | Gap under door | High | Install door sweep |
| Bar floor drain | Fruit fly activity | High | Clean drain, treat |
Reviewing this map at the start of each week keeps your team focused on the right areas and builds the monitoring record that FSSAI inspectors expect to see during audits.
Step 2. Remove food, water, and hiding spots
Once you’ve mapped your risk areas, your next move is to eliminate the conditions that keep pests alive inside your restaurant. Sanitation and clutter control form the backbone of any effective pest control for restaurants program because pests can’t survive long without reliable access to food, water, and shelter. Take away those three things consistently, and you make your restaurant genuinely hostile to infestation.
Pests don’t persist in your restaurant because of one lapse. They persist because of a pattern of small oversights repeated daily.
Cut off food and water sources
Cockroaches and rodents can thrive on surprisingly small amounts of food residue. Grease buildup under fryers, spilled sugar near beverage stations, and forgotten produce scraps behind cold storage units all provide enough sustenance to support an active pest population. Your cleaning schedule needs to reach every surface pests can access, not just the obvious countertops.
Use this daily sanitation checklist to hold your team accountable:
- Wipe down all food prep surfaces and equipment after each shift
- Sweep and mop under all kitchen equipment, not just around it
- Empty and clean floor drains at closing
- Store all dry goods in sealed, hard-sided containers placed off the floor
- Remove standing water from sinks, trays, and condensation drip pans before closing
- Dispose of food waste in lidded bins and remove bags from the kitchen at end of service
Remove clutter and harborage sites
Pests don’t just need food and water. They need safe, undisturbed places to nest and breed. Cardboard boxes stacked in your dry storage area, broken equipment left in corners, and rarely moved furniture all create ideal harborage. The longer an item sits undisturbed, the more attractive it becomes to rodents and cockroaches looking for a nesting site.
Conduct a monthly harborage audit using this simple log:
| Area | Clutter Found | Action Taken | Date Completed |
|---|---|---|---|
| Dry storage | Cardboard boxes stacked on floor | Replaced with plastic shelving | |
| Equipment room | Unused fryer stored in corner | Removed from premises | |
| Bar back area | Excess packaging materials | Disposed of and area reorganized |
Replacing cardboard with plastic storage bins throughout your dry goods area removes one of the most common cockroach harborage materials in commercial kitchens. Reducing clutter consistently is one of the highest-return actions you can take because pests cannot nest in what simply isn’t there, and it costs you nothing beyond labor and discipline.
Step 3. Block entry points and fix exterior risks
No matter how clean your kitchen is, pests will keep returning if your building gives them easy ways to get inside. Exclusion is the physical side of pest control for restaurants, and it’s one of the most cost-effective investments you can make. A sealed building dramatically reduces how hard your sanitation and treatment efforts have to work, because you’re cutting off the problem at the source rather than managing arrivals after the fact.
A restaurant that keeps its interior spotless but ignores its exterior is fighting pests with one hand tied behind its back.
Find and seal structural gaps
Your first job is to identify every opening a pest could use to enter your facility. Cockroaches can squeeze through gaps as thin as 1.5mm, and mice can pass through any hole wider than 6mm. Walk the full perimeter of your building, including the roof line and any utility penetrations, and treat every gap as a risk until it’s sealed.

Work through this exclusion checklist and mark each item as fixed or pending:
| Entry Point | What to Use | Priority |
|---|---|---|
| Gaps around pipes and conduits | Steel wool packed tight, then sealed with caulk | High |
| Cracks in exterior walls or foundation | Exterior-grade sealant or cement mortar | High |
| Gap under back doors and receiving doors | Heavy-duty door sweep or rubber threshold seal | High |
| Damaged window screens | Replace with 16-mesh or finer wire screen | Medium |
| Open floor drains without covers | Fit with stainless drain covers with mesh inserts | High |
| Gaps where walls meet the floor inside | Apply caulk bead along the full joint | Medium |
Fix exterior risks that attract pests before they enter
Sealing gaps handles the building itself, but your immediate exterior environment can pull pests toward your walls in the first place. Dumpsters placed directly against the building, standing water in loading bays, and overgrown vegetation along your foundation all give pests a staging ground right at your doorstep.
Take these specific corrective actions to reduce exterior pressure:
- Move waste bins at least 3 meters from any building entrance or doorway
- Keep lids on all exterior bins and wash them down weekly to remove residue
- Fix drainage issues in your loading dock so water doesn’t pool after rain
- Trim back vegetation, shrubs, and ground cover within one meter of your exterior walls
- Stack incoming deliveries on pallets, not directly on the ground, to eliminate harborage
Check your exterior monthly and document what you find. Consistent exterior maintenance prevents the gradual buildup of conditions that eventually force pests indoors, which makes every other step in your IPM program more effective.
Step 4. Monitor pests and keep simple records
Monitoring is what separates a reactive pest control program from a proactive one. Without regular monitoring, pest activity can build undetected for weeks before it becomes visible, and by then you’re already dealing with an established infestation rather than an early warning sign. In a restaurant environment, structured monitoring gives you and your pest control provider the data you need to make accurate decisions about when and where to intervene, rather than guessing.
Place monitoring stations in the right locations
Glue boards and snap traps are the workhorses of any pest control for restaurants monitoring program. Place them in zones where pest activity is most likely, based on the risk map you created in Step 1. Each station should sit flush against a wall because rodents and cockroaches travel along edges, not open floor space. Label every station with a number so you can reference it consistently in your records.
Use this placement guide to set up your initial monitoring network:
| Station # | Location | Target Pest | Check Frequency |
|---|---|---|---|
| 1 | Behind reach-in refrigerator | Cockroach | Weekly |
| 2 | Dry storage floor corner | Cockroach, Rodent | Weekly |
| 3 | Receiving dock, inside door | Rodent | Weekly |
| 4 | Bar floor drain area | Cockroach, Flies | Weekly |
| 5 | Under dishwashing station | Cockroach | Weekly |
| 6 | Exterior back door, inside | Rodent | Weekly |
The moment you stop checking your traps consistently, your monitoring program stops working.
Log findings every week without fail
Checking stations means nothing unless you record what you find each time. Your log doesn’t need to be elaborate. A simple paper sheet or shared digital document works perfectly. What matters is consistency and detail: date, station number, what you found, and what action you took in response.
Here’s a weekly monitoring log template you can print and keep in your kitchen:
| Date | Station # | Finding | Action Taken | Staff Name |
|---|---|---|---|---|
Keep at least three months of completed log sheets on file at all times. FSSAI inspectors expect documented evidence of ongoing pest management, and this log is your simplest, most direct proof that your program is active. Reviewing trends across multiple weeks also tells you whether a problem area is improving or getting worse, which directly shapes the treatment decisions you’ll make in the next step.
Step 5. Use food-safe treatment and call pros
When prevention, exclusion, and monitoring haven’t fully resolved an active infestation, targeted chemical treatment becomes necessary. In a restaurant environment, the key word is targeted. You never apply pesticides broadly across food prep surfaces or open kitchen areas. Instead, you use the right product in the right location, applied precisely to cracks, voids, and harborage zones where pests actually live, keeping your staff and customers safe throughout.
Chemical treatment in pest control for restaurants is always a last resort, not the first tool you reach for.
Choose the right products for a food service environment
Not every pesticide is legal or safe to use in a kitchen. FSSAI-compliant food businesses must use products registered for use in food handling areas, and you must confirm this before anything gets applied. Gel baits are the most practical choice for cockroach control in kitchens because you apply them in tiny amounts directly inside cracks and equipment gaps, keeping active ingredients completely away from food contact surfaces. Insect growth regulators (IGRs) work well as a supplement because they interrupt the breeding cycle rather than just killing adults, which reduces reinfestation significantly over the following weeks.
Use this quick reference to match treatment type to pest and location:
| Pest | Recommended Treatment | Application Location |
|---|---|---|
| Cockroach | Gel bait + IGR | Inside equipment gaps, wall voids, drain edges |
| Rodent | Tamper-resistant bait station | Along walls, near entry points, outside building |
| Flies | Insect light trap (ILT) | Near entry doors, away from food prep zones |
| Stored product insects | Pheromone traps | Inside dry storage, on shelving units |
Always read the product label and application rate before use, and record every treatment in your monitoring log with the product name, active ingredient, location applied, and the name of the person who applied it.
When to call a professional pest control service
Some situations require a licensed professional rather than in-house action. Heavy rodent activity, a large cockroach population, or a recurring infestation that hasn’t responded to your IPM steps all signal that you need expert intervention. A qualified technician brings access to restricted-use products, specialized equipment, and the ability to identify conditions your own inspection may have missed.
Choose a pest control provider who supplies you with a written service report after every visit, including what was found, what was applied, and what follow-up is needed. That documentation feeds directly into your FSSAI compliance records and keeps your entire IPM program audit-ready at all times.
Next steps
You now have a complete framework for pest control for restaurants built on the five IPM steps: inspect and map risk areas, remove food and water sources, block entry points, monitor consistently, and apply food-safe treatment when needed. Each step builds on the one before it, so work through them in order rather than jumping straight to treatment. Start your inspection this week, create your risk map, and build your monitoring stations before you touch a single product.
Consistency is what makes this system work. A thorough inspection done once means little if your sanitation slips or your monitoring logs go blank for weeks at a stretch. Assign clear responsibilities to your team, review your logs every week, and treat every gap you find as an urgent fix rather than a future task.
If you need professional support to get your program started or to resolve an active infestation, contact the commercial pest control team at A to Z Pest Solutions for a site assessment.