
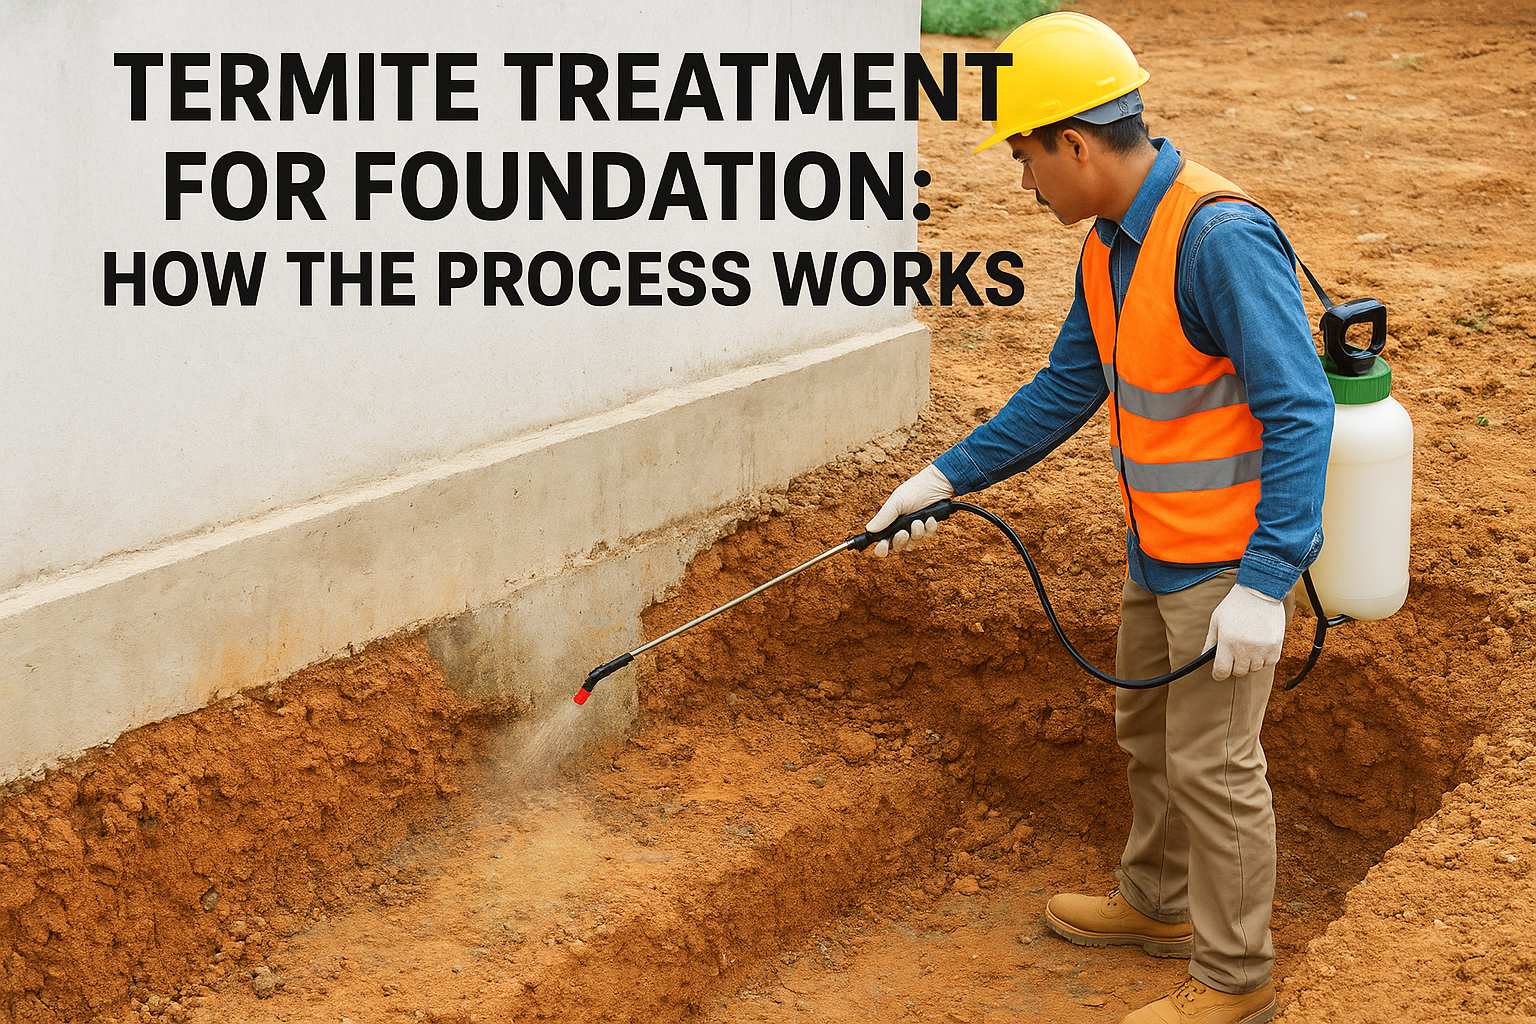
If you’re pouring a foundation in Bangalore right now, you have one shot at getting termite treatment for foundation work right. Once the slab is cast and the walls go up, you can’t go back and treat the soil underneath. Termites in this region don’t wait for you to notice a problem years later; they move through soil and enter through the smallest gaps in concrete, and pre-construction treatment is the only stage where you control the whole perimeter.
This guide walks through exactly how termite treatment for foundation work proceeds, so you know what a proper job looks like versus a rushed one. We cover the chemical barrier method, the timing around excavation and backfilling, and why the treatment happens in stages rather than one spray.
We’ve handled foundation treatments across Bangalore’s apartments, villas, and independent houses since 1993, and the process rarely changes because the science behind it doesn’t. You’ll learn what chemicals get used, how deep and wide the soil treatment needs to go, and when each application happens during construction, so you can check the work being done on your own site or ask the right questions before signing off on it.
Why foundation termite treatment matters
Termites target the foundation first
Subterranean termites, the species behind nearly every infestation in Bangalore, live in soil colonies and travel upward looking for cellulose. They don’t fly into your house through a window; they build mud tubes through the tiniest cracks in concrete, expansion joints, and utility openings that pass through the foundation. Once a colony finds a gap between the soil and the slab, it has a direct, hidden route into your walls, door frames, and wooden fixtures. That’s why termite treatment for foundation work isn’t just another surface to treat, it’s the single point where you can block every entry route before the structure even exists above ground.
Once the slab is poured, there’s no second chance to treat the soil beneath it, so foundation-stage treatment is the only real opportunity to stop termites before they start.
The cost of skipping it
Homeowners often assume they can treat for termites later if a problem shows up, but retrofitting a finished building is far more invasive and expensive than treating the foundation during construction. Post-construction treatment usually means drilling into flooring and walls to inject chemicals, which disturbs finishes and still can’t guarantee full soil coverage under a slab that’s already poured. Pre-construction treatment, by comparison, is done in open trenches before the concrete goes down, which means every inch of soil gets treated evenly.
| Factor | Pre-construction treatment | Post-construction treatment |
|---|---|---|
| Access to soil | Full, open trenches | Limited, requires drilling |
| Cost | Lower, done during construction | Higher, includes repair work |
| Coverage | Continuous barrier under entire footprint | Partial, gap-dependent |
| Disruption | None to finished structure | Drilling, dust, repainting |
| Warranty period offered | Typically 5 to 10 years | Usually shorter, 1 to 3 years |
Bangalore’s soil and climate raise the stakes
Red laterite soil, common across much of Bangalore, retains moisture well and gives termite colonies an easy path to travel through undetected. Add the city’s monsoon months, when groundwater sits closer to the surface, and you get conditions that favor species like Odontotermes obesus, one of the most common foundation-invading termites in South India. Builders who skip proper anti-termite treatment at this stage are relying on luck, not science, and luck runs out fast once wooden door frames and furniture start showing damage within two or three years of occupancy.
What proper compliance looks like
India’s construction standard for this work, IS 6313, spells out the treatment stages, chemical concentrations, and application depths expected for residential and commercial foundations, a standard also referenced by industry resources like termitepestcontrol.co.in. Following this standard isn’t optional if you want a treatment that actually holds up; it’s the baseline that separates a documented, verifiable job from a technician spraying chemical near the trench and calling it done. Any contractor who can’t explain how their process maps to these stages hasn’t done foundation treatment the right way, regardless of what they charge.
Step 1. Prepare the site and soil
Before any chemical touches the ground, the excavation has to be in the right condition. Rushing this stage is the most common reason a termite treatment for foundation job fails within a few years, because chemicals applied to loose, wet, or debris-filled soil never form a continuous barrier.
Clear the trench and excavation base
First, the excavated trenches and pits need to be free of construction debris, tree roots, and loose soil clumps before treatment starts. Roots left behind decay over time and create hollow channels that termites use as ready-made tunnels straight into your foundation. Contractors also level the excavation base at this point, since an uneven surface causes chemical solution to pool in some spots and skip others entirely. On sites with rocky or hard laterite soil, the base often gets a light loosening pass so the chemical can actually soak in rather than run off the surface.
Check soil moisture before application
Soil that’s too dry won’t absorb the chemical evenly, and soil that’s waterlogged from recent rain dilutes it past the point of effectiveness. Technicians typically wait for a dry spell after monsoon showers, or lightly water dry soil beforehand, to get moisture into a workable range. This step matters more in Bangalore than in drier regions, since the red laterite soil common here holds water unevenly across a single plot.
A termite barrier is only as good as the soil it’s built into, so preparation determines whether the chemical works at all.
Site prep checklist
Before treatment begins, a proper site should meet these conditions:
- Trenches and pits excavated to the depth specified in the structural drawings
- All wood scraps, root systems, and formwork debris removed
- Excavation base leveled and free of standing water
- Soil moisture checked and adjusted if too dry or too wet
- Utility trenches for plumbing and electrical conduits identified, since these get treated separately
- Access confirmed around the entire building perimeter, not just the visible sides
Getting this checklist right takes an extra hour or two on-site, but it’s the difference between a barrier that holds for a decade and one that develops gaps within the first monsoon season.
Step 2. Treat the soil and foundation base
Once the trench is clean, level, and at the right moisture, the actual termite treatment for foundation work begins with the chemical barrier stage. This is the stage most people picture when they think of anti-termite treatment, but it’s really the second layer of protection, not the first, since site prep already decided whether this layer will hold.
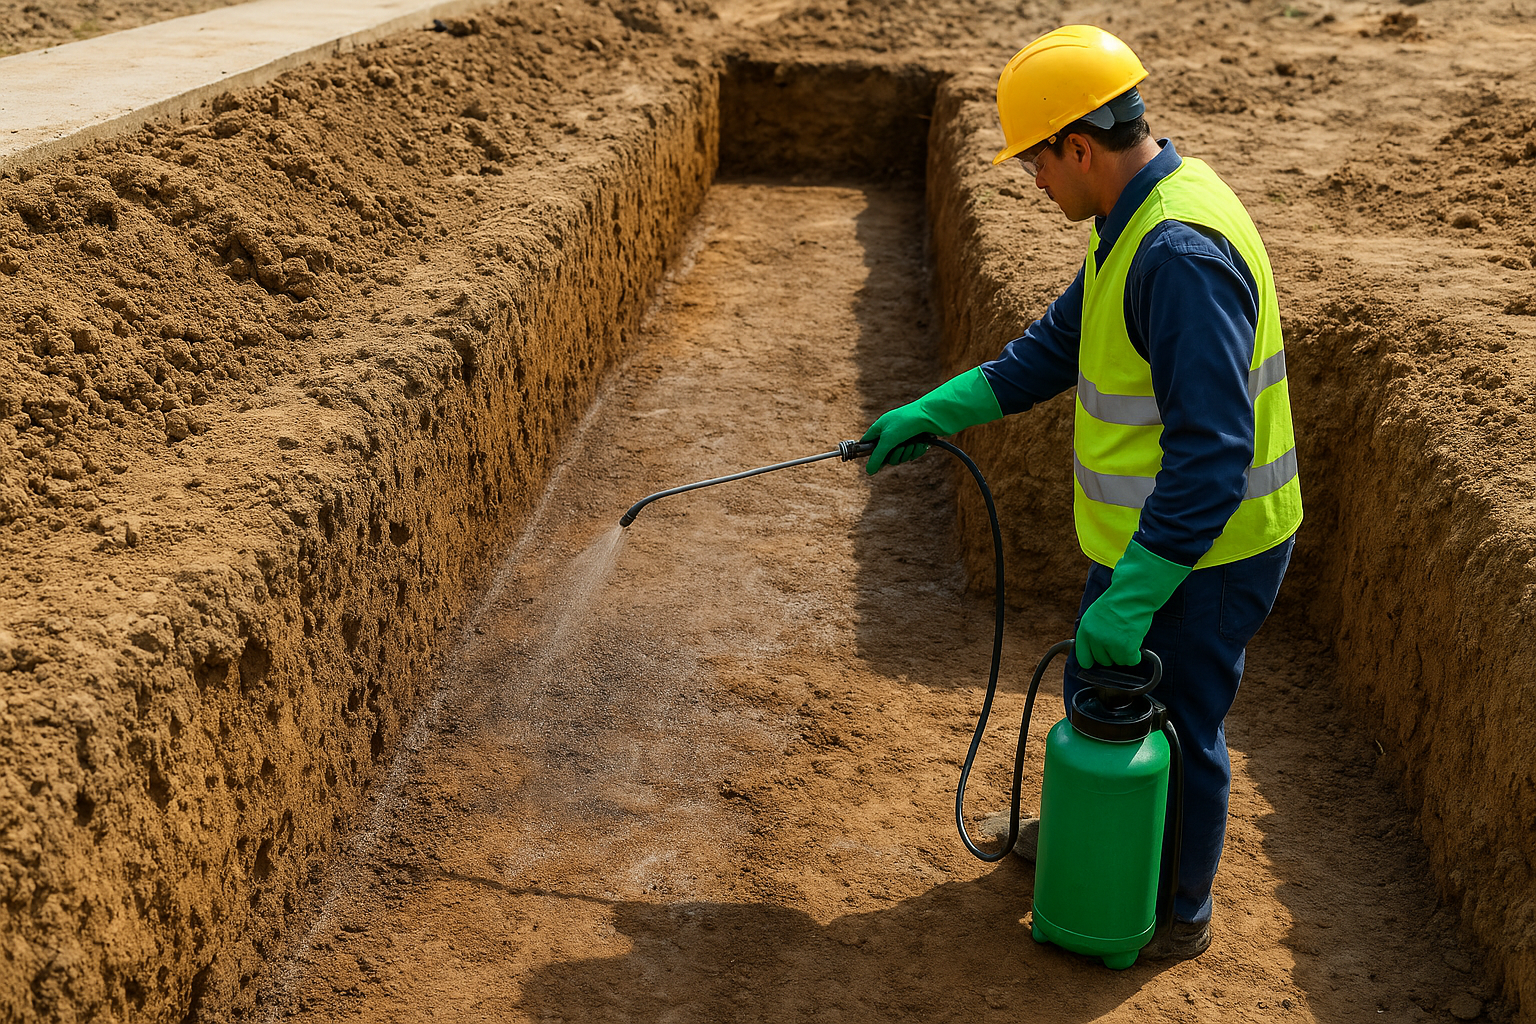
Applying chemical to the excavation floor
Technicians spray or pour the treatment solution evenly across the bottom of every trench and pit, working in sections so the chemical soaks into the soil rather than sitting on top of it. Common formulations include chlorpyrifos, imidacloprid, or fipronil, mixed to the concentration specified in IS 6313, and applied at a fixed dosage per square meter of excavation floor. Getting this dosage right matters more than the brand of chemical used; under-dosing creates a barrier full of thin spots that termites eventually find.
| Application area | Typical dosage rate |
|---|---|
| Bottom of excavation (flat surface) | 5 liters per square meter |
| Sides of trenches and pits | 7.5 liters per square meter, per meter of depth |
| Backfill soil, in layers | 5 liters per square meter, per 30 cm layer |
Treating the trench sides before backfilling
After the floor is treated, the sides of the trenches and pits get sprayed too, since termites travel along vertical soil faces just as easily as flat ground. Backfilling then happens in layers, roughly 30 centimeters at a time, with fresh chemical applied to each layer before the next one goes in. Skipping this layered approach and dumping backfill in one go is a shortcut that leaves large sections of soil completely untreated, no matter how well the base was sprayed.
A single spray on the trench floor isn’t a barrier, it’s the layered treatment through backfilling that actually seals the soil against termites.
Why the base treatment sets the tone
Since this soil treatment stage forms the platform every later step builds on, any gap here shows up as a weak point for years to come. Foundations poured over an inconsistently treated base often show localized termite entry near columns or footings first, exactly where the barrier was thinnest. Proper documentation, photos of each treated layer, dosage logs, and the chemical brand used, gives you proof the work was done in stages rather than rushed through in an afternoon.
Step 3. Treat plinth, columns, and wall junctions
Once the base and backfill are treated, this stage of termite treatment for foundation work shifts upward to the plinth level, where the foundation walls meet the ground floor slab. This is where a lot of foundation-stage termite treatment quietly falls short, because contractors treat the horizontal soil layers well but skip the vertical junctions where columns, footings, and masonry walls interrupt the barrier. Termites exploit exactly these interruptions, so this stage of termite treatment for foundation work needs the same discipline as the earlier soil application.
Treating the plinth filling
Before the plinth is filled with soil or rubble, that fill material gets its own chemical treatment, applied in layers just like the backfill around the trenches. Masons often want to rush this step since it happens right before flooring work begins, but skipping it leaves a wide band of untreated material directly under the ground floor, right where termites prefer to travel toward wooden door frames and skirting.
Sealing column and footing junctions
Columns, footings, and the points where masonry walls rise from the foundation create small gaps against the surrounding soil that plain trench treatment doesn’t reach. Technicians treat a narrow trench, usually 15 to 20 centimeters wide, dug along the external and internal perimeter of these junctions, then refill it with treated soil. This targeted step closes the exact spots where a general soil treatment application naturally thins out.
The junctions between columns, footings, and walls are where most untreated gaps hide, so treating them separately is what keeps the barrier continuous.
Junction points that need separate attention
- Column bases meeting the foundation trench
- Footing edges along the building perimeter
- Junctions where internal load-bearing walls meet the foundation
- Points where the plinth beam sits on masonry
- Expansion joints and construction joints in the foundation walls
Coordinating with masonry work
Masons and pest control technicians need to work in sequence here, not simultaneously, since wet chemical under fresh masonry work gets displaced before it can bind properly. Sites that plan this handoff in advance avoid the common problem of masonry contractors filling gaps before the pest control team has finished treating them.
Step 4. Add barrier protection and final checks
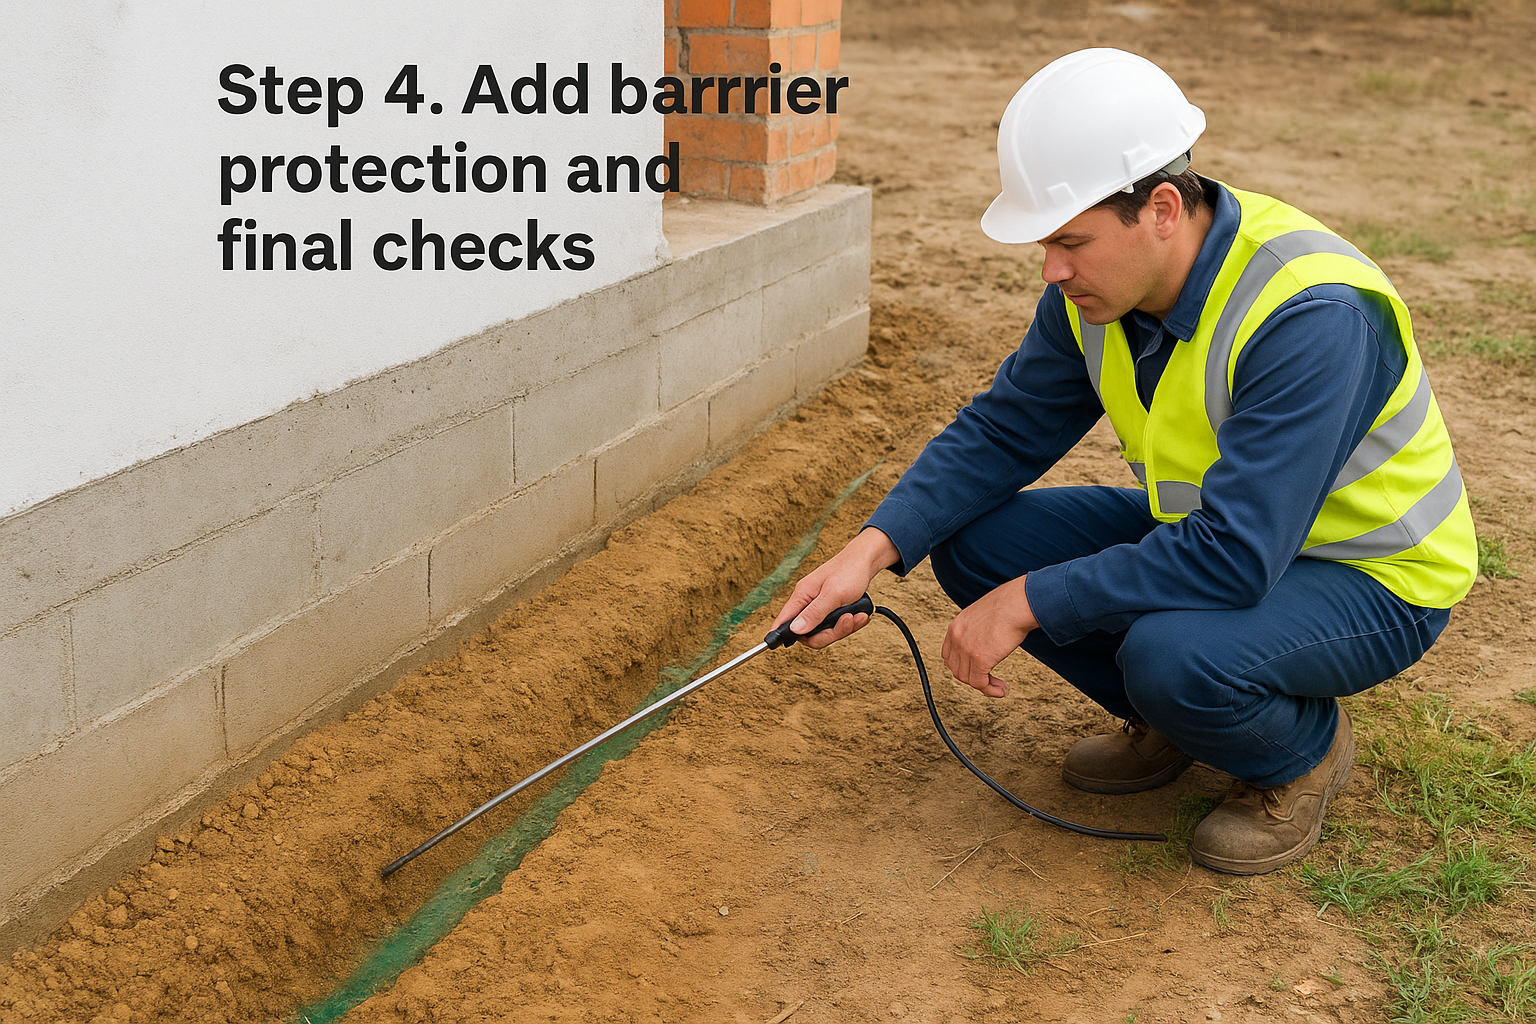
With the soil, backfill, and junctions treated, the last stage of termite treatment for foundation work builds a continuous vertical barrier around the finished foundation and confirms nothing got missed before the site moves on to flooring. Skipping this stage leaves the treated soil exposed to future disturbance, whether from landscaping, drainage work, or utility repairs that happen years after occupancy.
Building the vertical chemical barrier
Technicians dig a shallow trench, typically 15 to 20 centimeters wide and running the full depth of the plinth, along the outer edge of the building’s perimeter. This trench gets treated with the same chemical solution used earlier, then backfilled with treated soil to form a vertical curtain that blocks termites approaching from outside the structure. Without this outer barrier, a colony sitting just beyond the treated footprint can tunnel sideways and enter above where the horizontal soil treatment stops.
An untreated gap at the building’s outer edge undoes every layer of soil treatment applied underneath, so the vertical barrier is what closes the loop.
Treating pipe and conduit penetrations
Every pipe, conduit, or duct that passes through the foundation creates a small annular gap around it, and termites use these openings more often than people expect. Applicators inject chemical solution directly around each penetration point after the pipework is laid but before the surrounding soil or concrete seals it permanently. Plumbing and electrical contractors need to flag these penetration points in advance so the pest control team doesn’t miss one hidden behind scaffolding or stacked materials.
Final verification before flooring begins
Before any flooring or plinth beam work locks the foundation away from view, a final walkthrough confirms every stage was completed correctly. A proper checklist at this point covers:
- All trench floors, sides, and backfill layers treated and documented
- Plinth filling treated in layers with dosage records
- Column, footing, and wall junctions treated separately
- Vertical perimeter barrier trench dug, treated, and backfilled
- Pipe and conduit penetrations individually treated
- Photos and chemical dosage logs collected for each stage
A contractor who can produce this documentation on request has done termite treatment for foundation work correctly. One who can’t is asking you to trust a process you’ll never be able to verify once the slab is poured.
Protecting your foundation for the long run
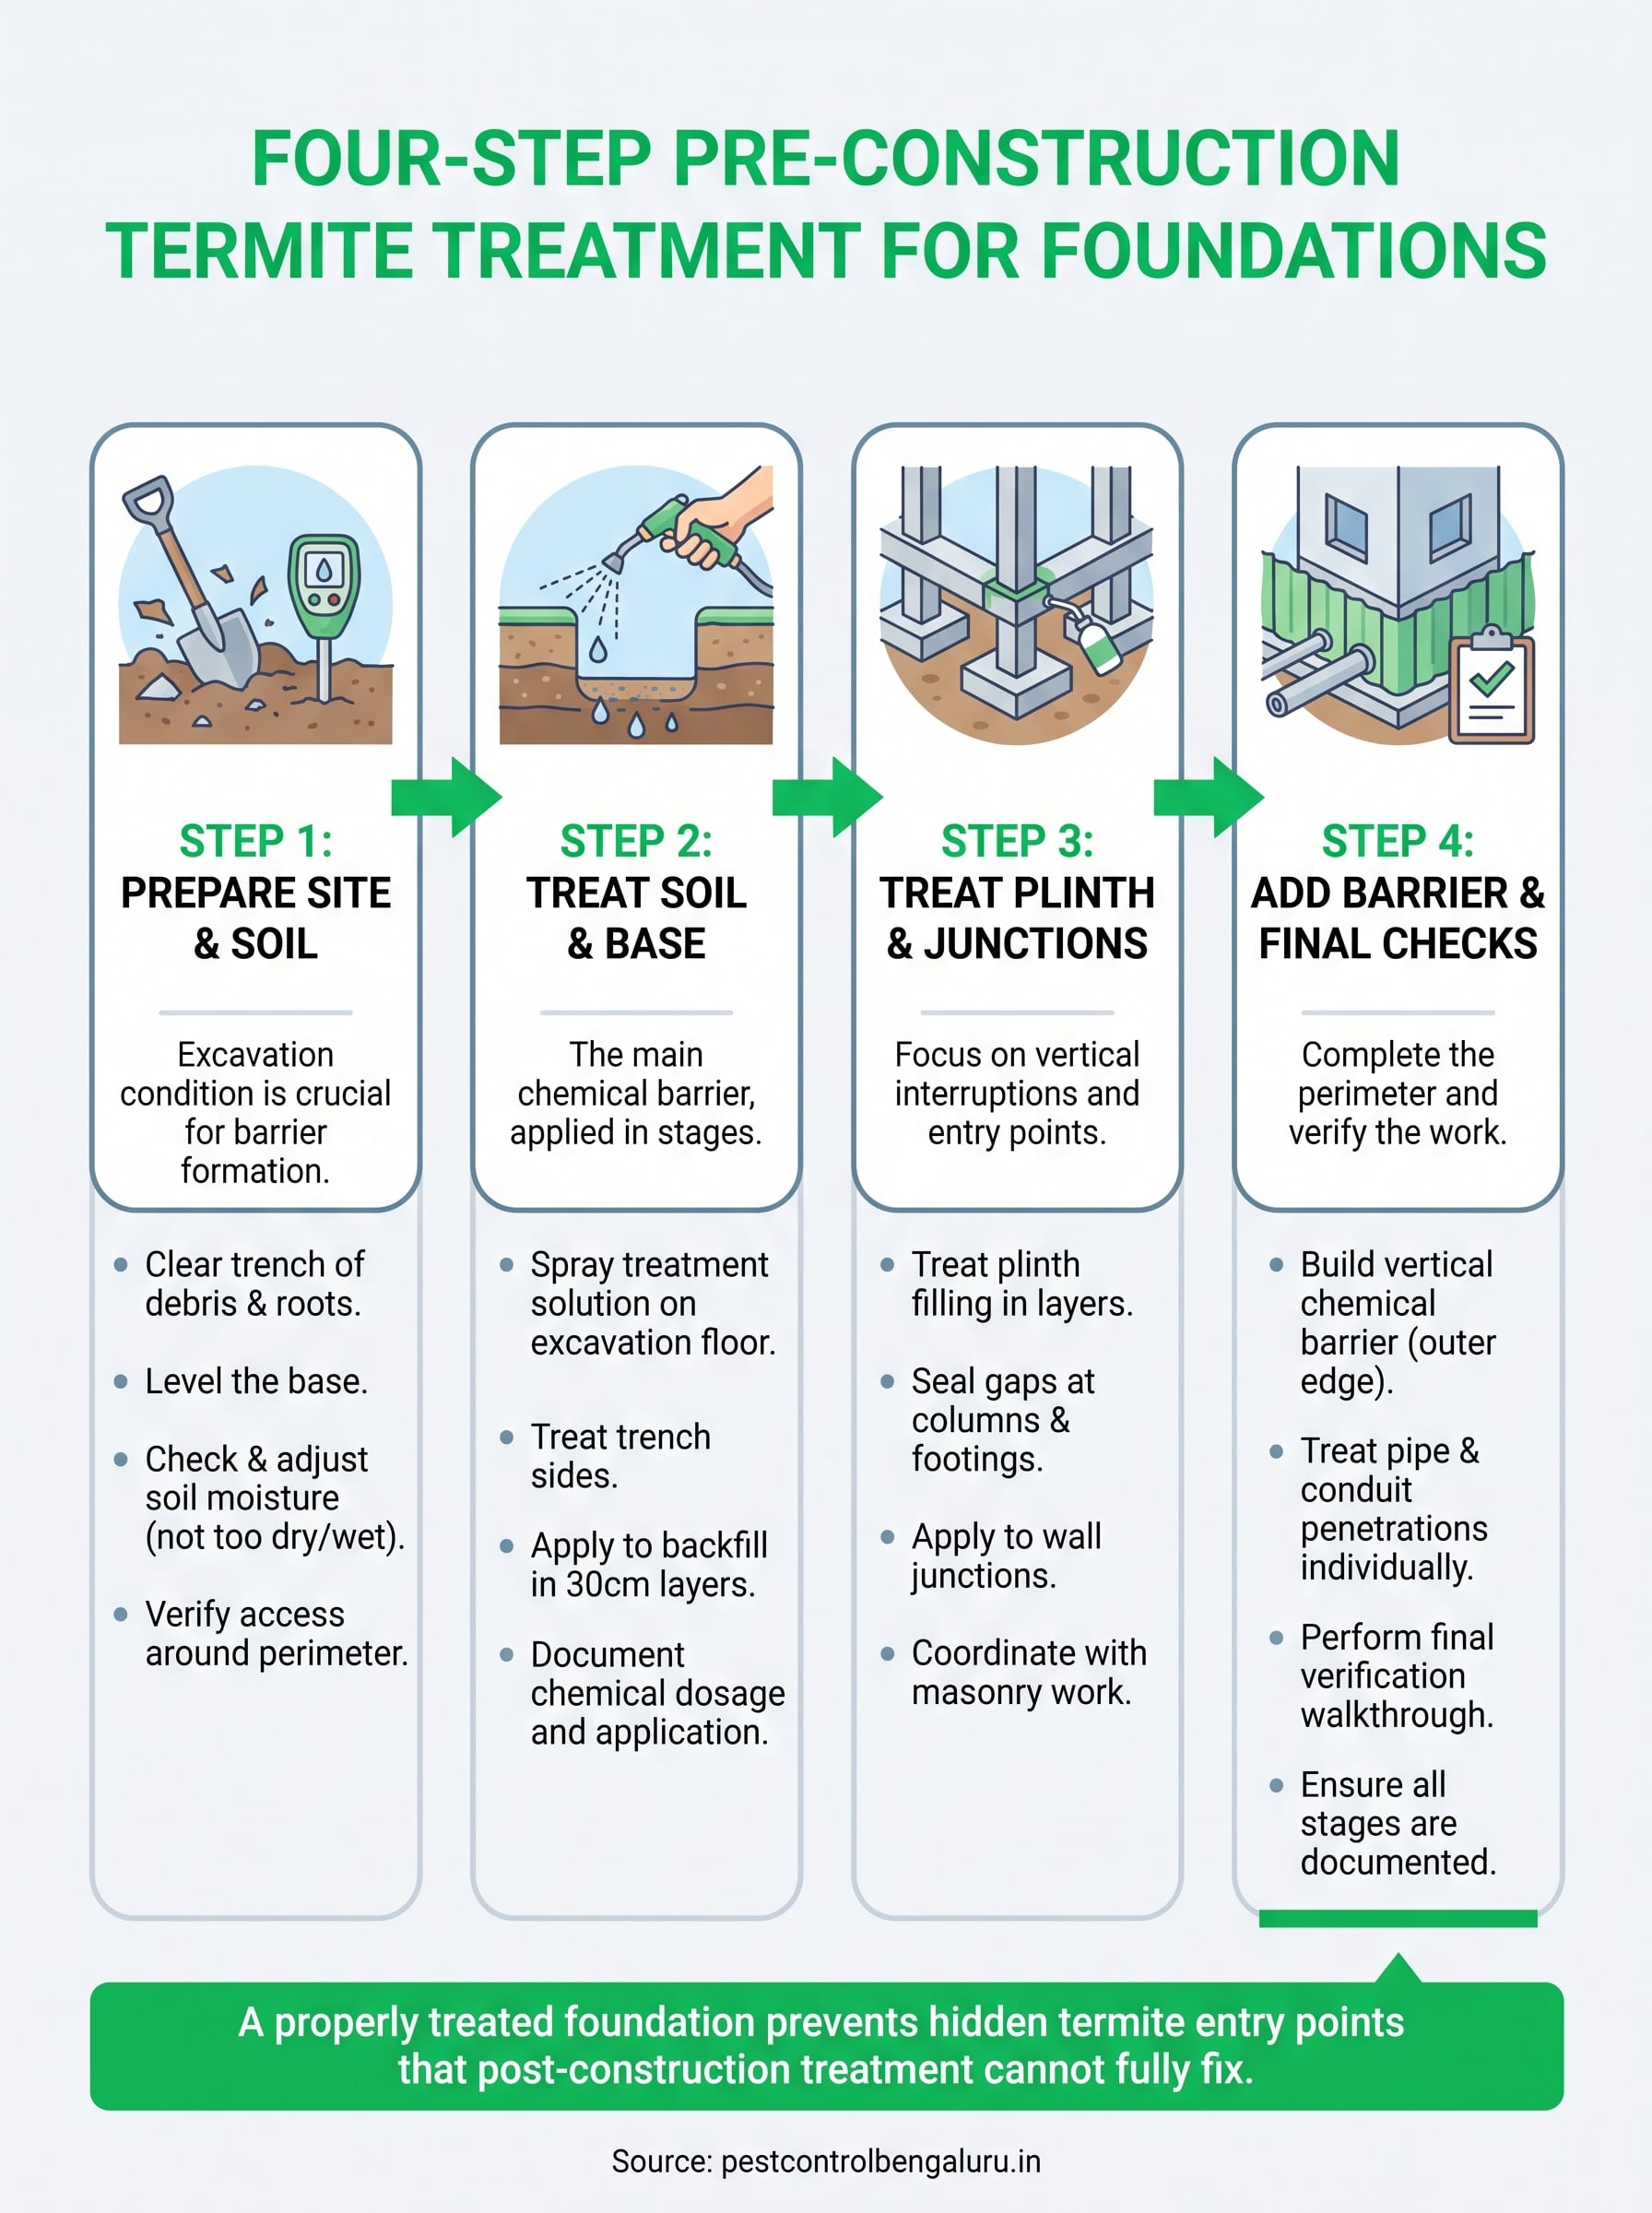
Getting termite treatment for foundation work right isn’t complicated, but it does demand discipline at every stage of termite treatment for foundation, from clearing the trench to sealing the last pipe penetration. Skip one layer and you’ve built a house with a hidden weak point that no amount of post-construction spraying can fully fix later. That’s the real takeaway here: soil preparation, base treatment, junction sealing, and the vertical barrier all depend on each other, and a contractor who documents each stage is giving you something a rushed job never can, proof.
Before your slab gets poured, ask your contractor to walk you through each stage covered in this guide and show you the dosage records.
If you’re still finalizing your construction timeline or want a technician to inspect the site before backfilling starts, book a pre-construction termite treatment with a team that’s handled this exact process across Bangalore since 1993.
Frequently asked questions
When during construction should termite treatment for foundation work happen?
It happens at the excavation stage, before the slab is poured, so the chemical barrier can be applied directly to open trenches, the excavation floor, and each backfill layer. Once the slab is cast, this soil access is gone for good.
Which chemicals are used in foundation termite treatment?
Common formulations include chlorpyrifos, imidacloprid, or fipronil, mixed and applied at the concentrations and dosage rates set out in IS 6313 for the excavation floor, trench sides, and layered backfill.
How long does a properly done treatment last?
Pre-construction treatment typically comes with a warranty of 5 to 10 years, compared to 1 to 3 years for post-construction work, because the barrier is continuous under the entire foundation footprint rather than applied around existing gaps.
Can termite treatment be redone after the foundation is sealed?
Not to the same standard. Post-construction treatment requires drilling into finished flooring and walls to inject chemical, which disturbs finishes and still cannot guarantee full soil coverage under a slab that’s already in place.
What documentation should a contractor provide?
Photos of each treated layer, dosage logs for every application, and the chemical brand used, covering the excavation floor, backfill, plinth filling, column and footing junctions, the vertical perimeter barrier, and pipe penetrations. This is what separates a verified job from a rushed one.
Why does Bengaluru’s soil make this treatment more important?
Red laterite soil retains moisture unevenly, and the city’s monsoon months bring groundwater closer to the surface, both of which favor subterranean termite species like Odontotermes obesus. That makes consistent, documented treatment more important here than in drier regions.